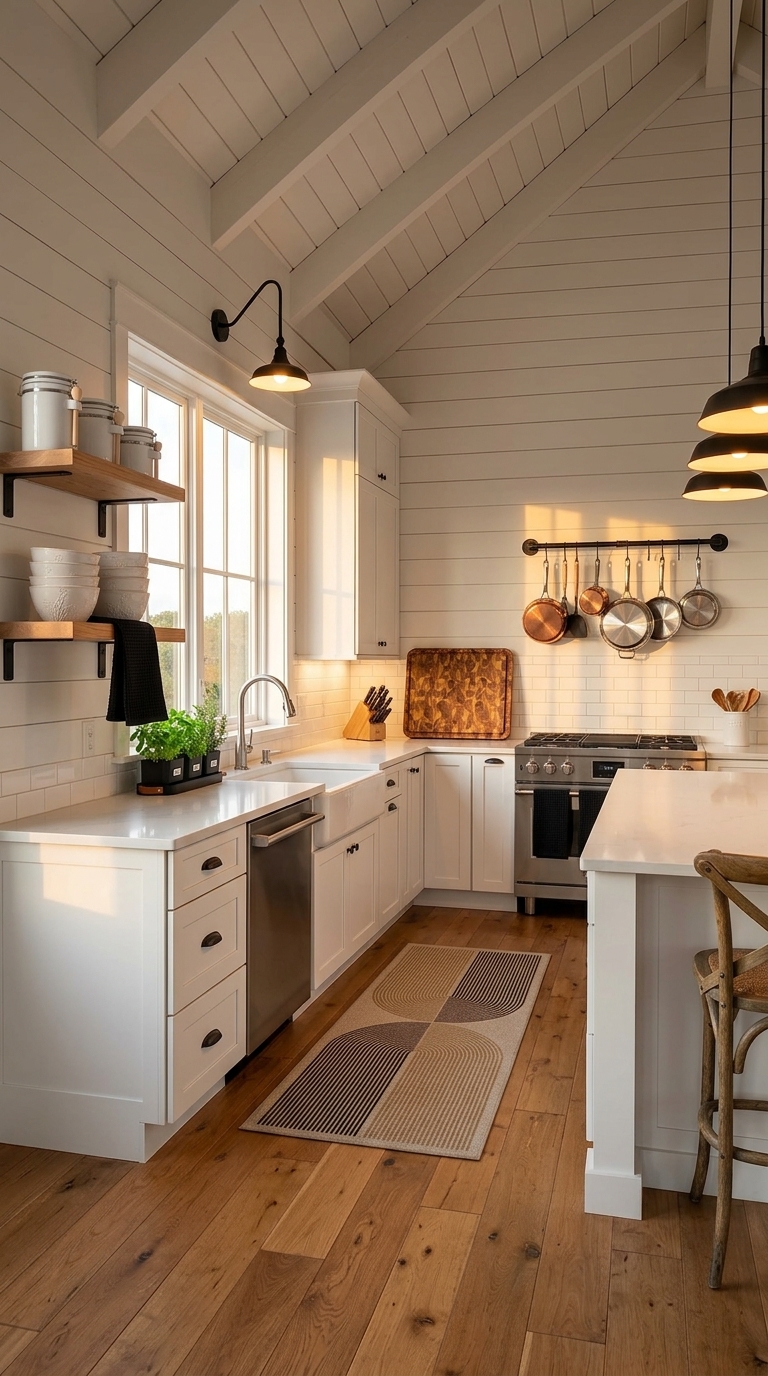
From Dull to Dream Kitchen — For Under $800
If a kitchen feels cluttered, closed-off, and stuck in the past, it’s not alone. One of the most transformative — and surprisingly affordable — upgrades available is switching to open shelving kitchen organization. No more hunting through cabinets. No more wasted wall space. Just a clean, styled, magazine-worthy kitchen that actually works for daily life.
This post walks through a complete modern farmhouse kitchen renovation, from the dated “before” to the stunning finished result — and shows every single product used so it can be recreated. The total product cost? Under $800 on Amazon.
Whether doing a full gut renovation or just swapping out a few shelves, this guide has everything needed to nail open shelving kitchen organization in 2026.
Shop the Look
Recreate this modern farmhouse kitchen with these handpicked Amazon products.
The Complete Renovation Journey
This transformation documents a real step-by-step kitchen renovation — from dated and abandoned to a warm, organized modern farmhouse kitchen. Every stage is documented below.
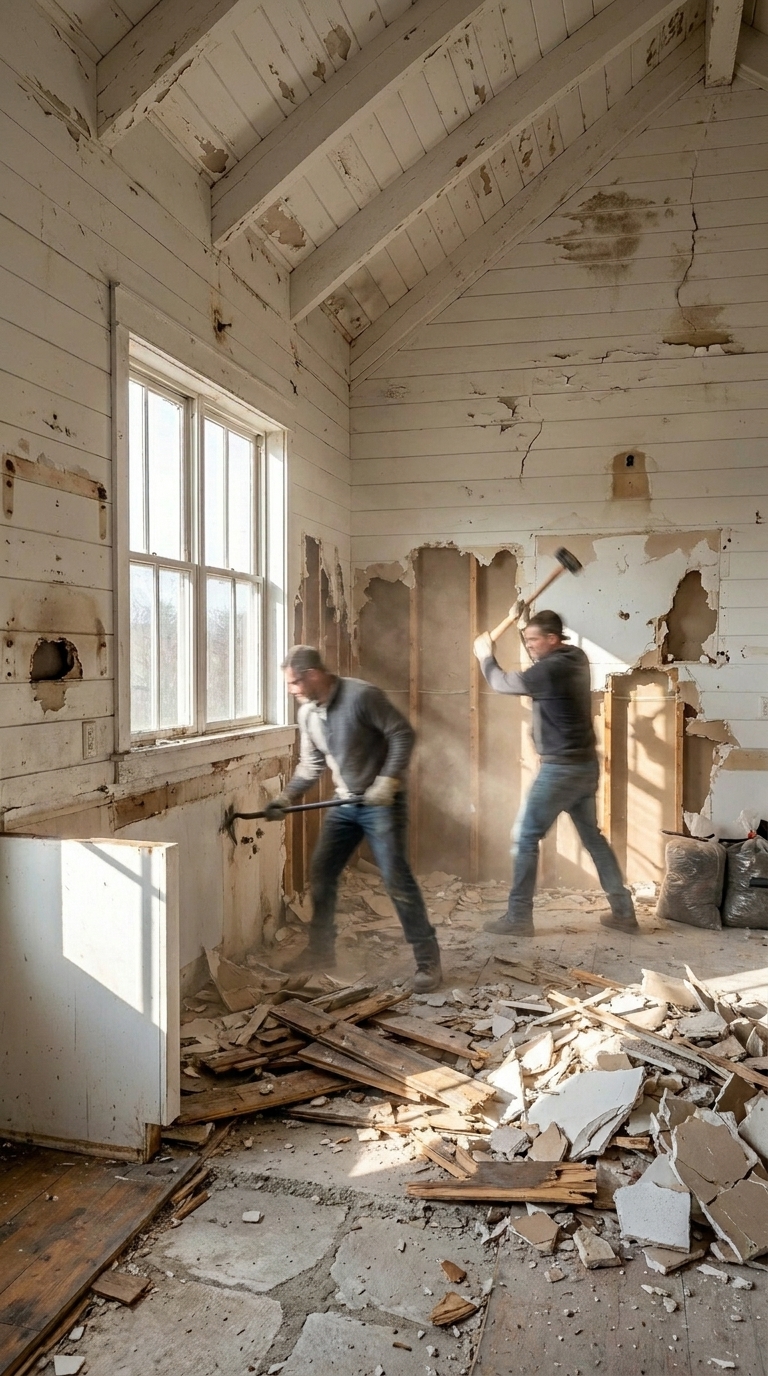
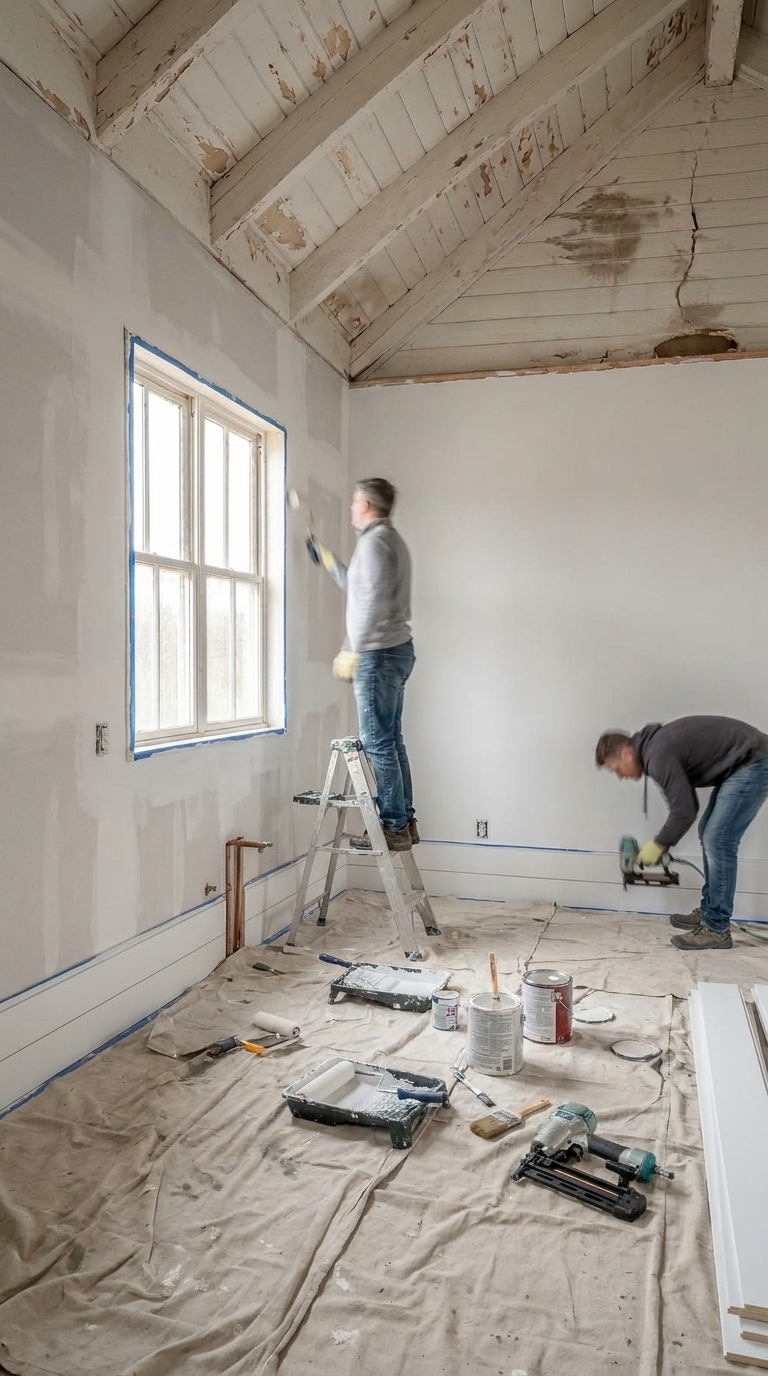
Stage 1 — The Before: A Kitchen That Had Seen Better Days
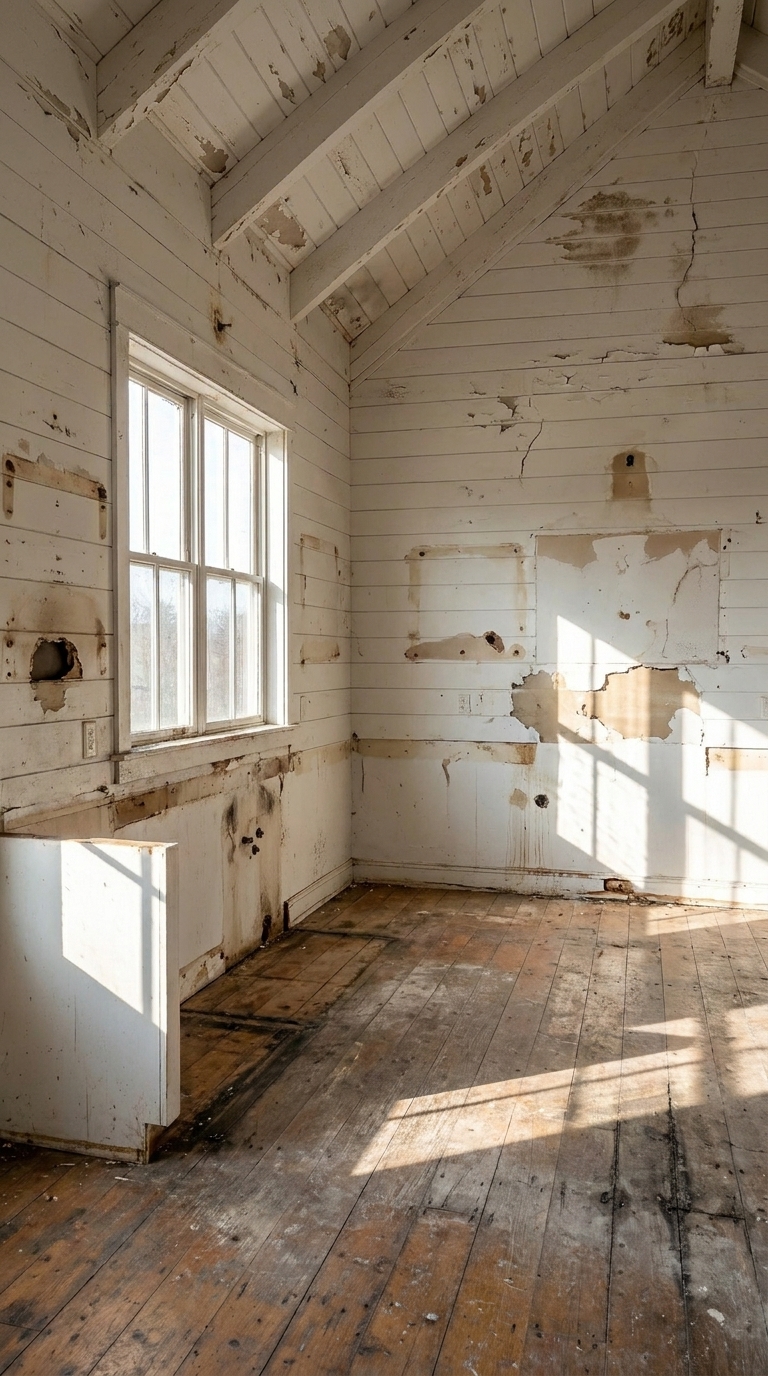
Peeling paint, worn hardwood, bare windows, and zero storage personality characterized this space. The kitchen had good bones but desperately needed a fresh vision. The walls showed years of neglect — marks where old cabinets had been removed, patches that never got painted. The floor had scratches and stains that no amount of cleaning could fix.
Stage 2 — Demolition: Clearing the Slate
Demo day is always satisfying. Out came the old baseboards, the damaged sections of drywall, and the worn floor sections that couldn’t be saved. Sledgehammer to the wall, crowbar to the trim — everything unnecessary was stripped back to expose clean structure to build from.
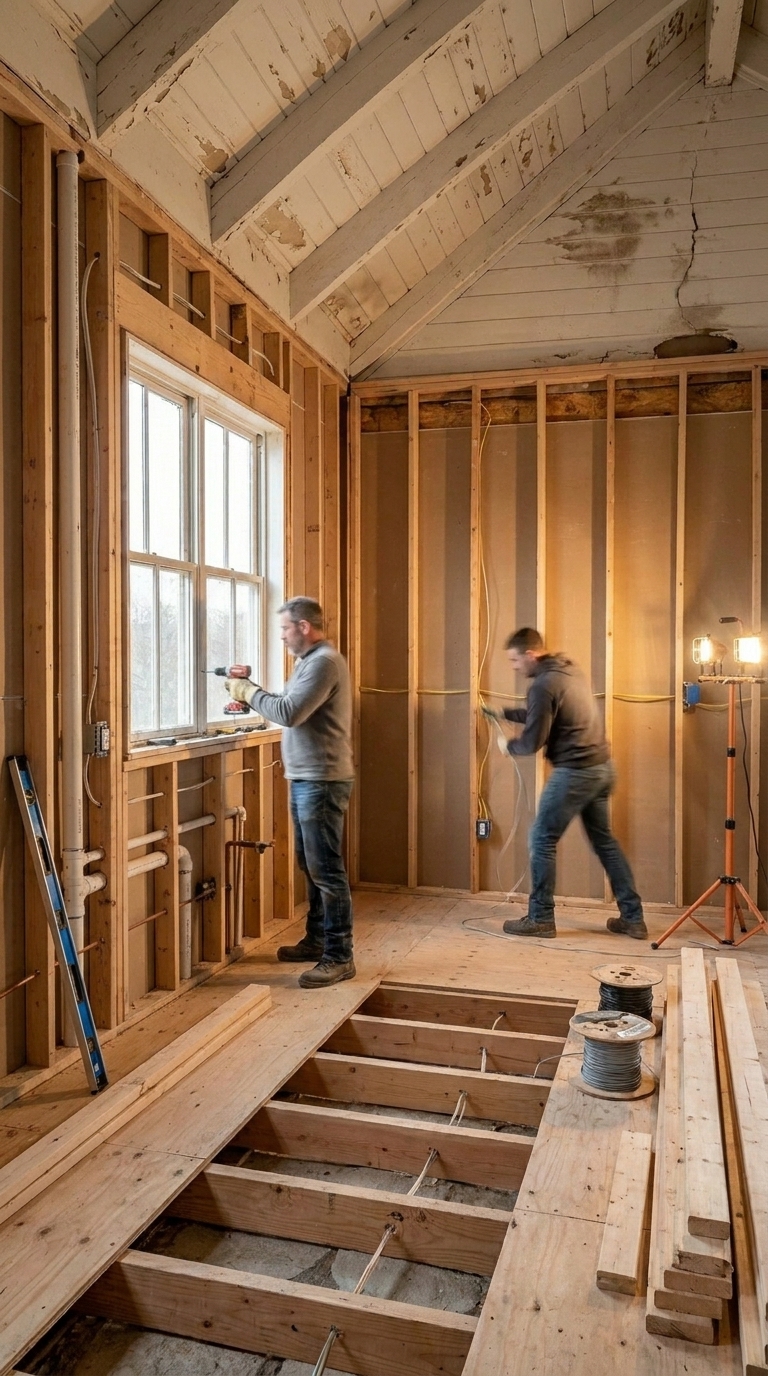
Stage 3 — Structural & Framing: Building the Foundation
With the old material gone, new wall framing was installed — including the key anchor points for the open shelving system. Electrical rough-in was updated to support under-cabinet lighting and the new pendant fixtures above the island. Plumbing was confirmed solid at the sink wall.
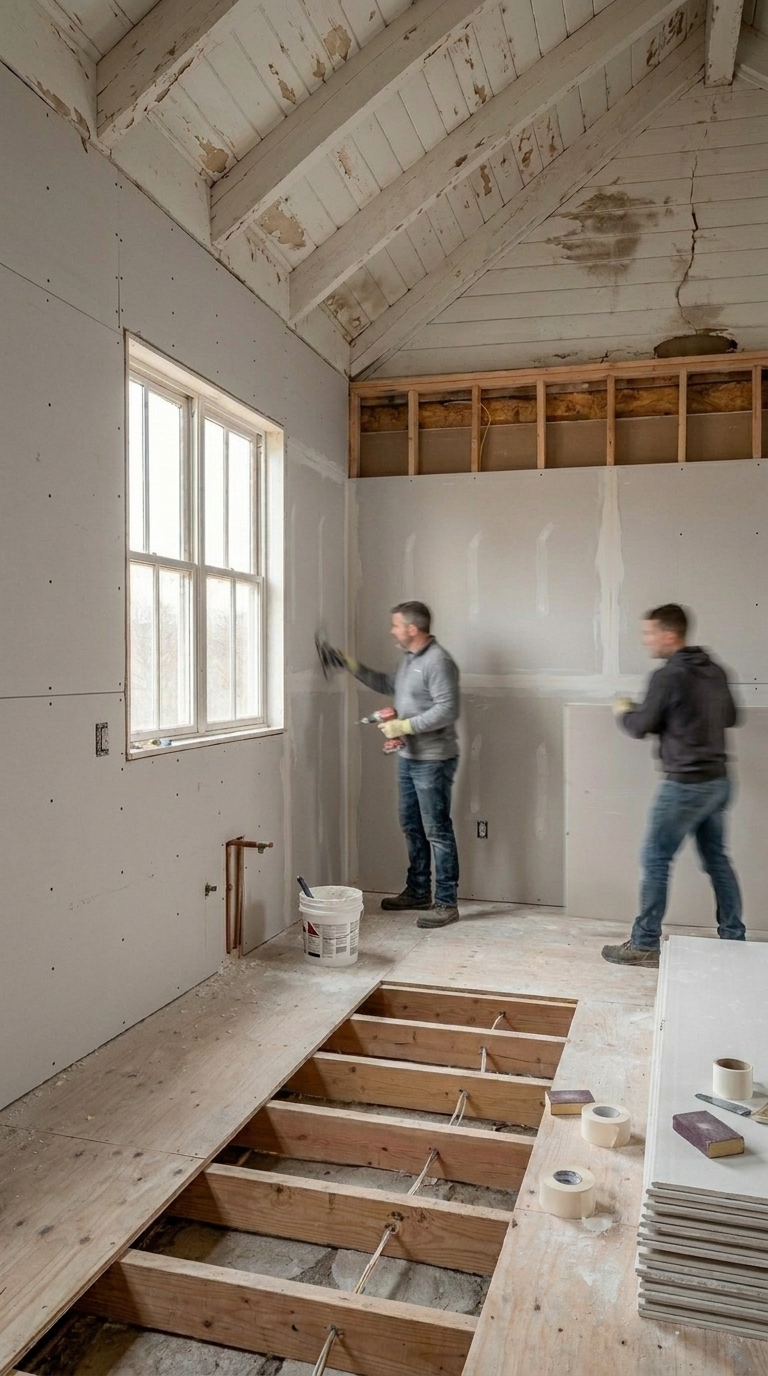
Stage 4 — Drywall & Subfloor: Closing the Walls
Fresh drywall was installed across all walls, taped and mudded smooth. The subfloor was leveled and prepped to receive the new hardwood planks. This stage is where the kitchen starts to feel like a real space again rather than a construction site.
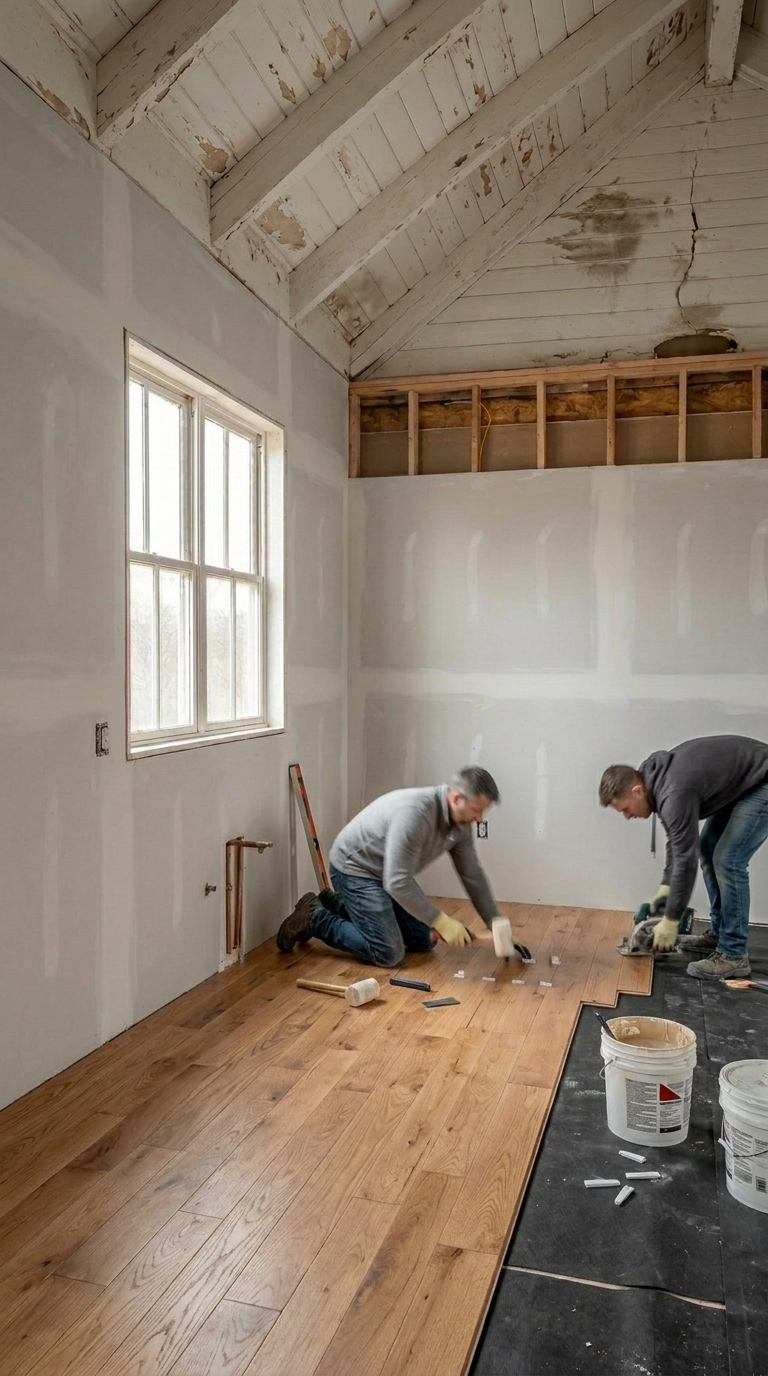
Stage 5 — Flooring: Warm Oak Hardwood Throughout
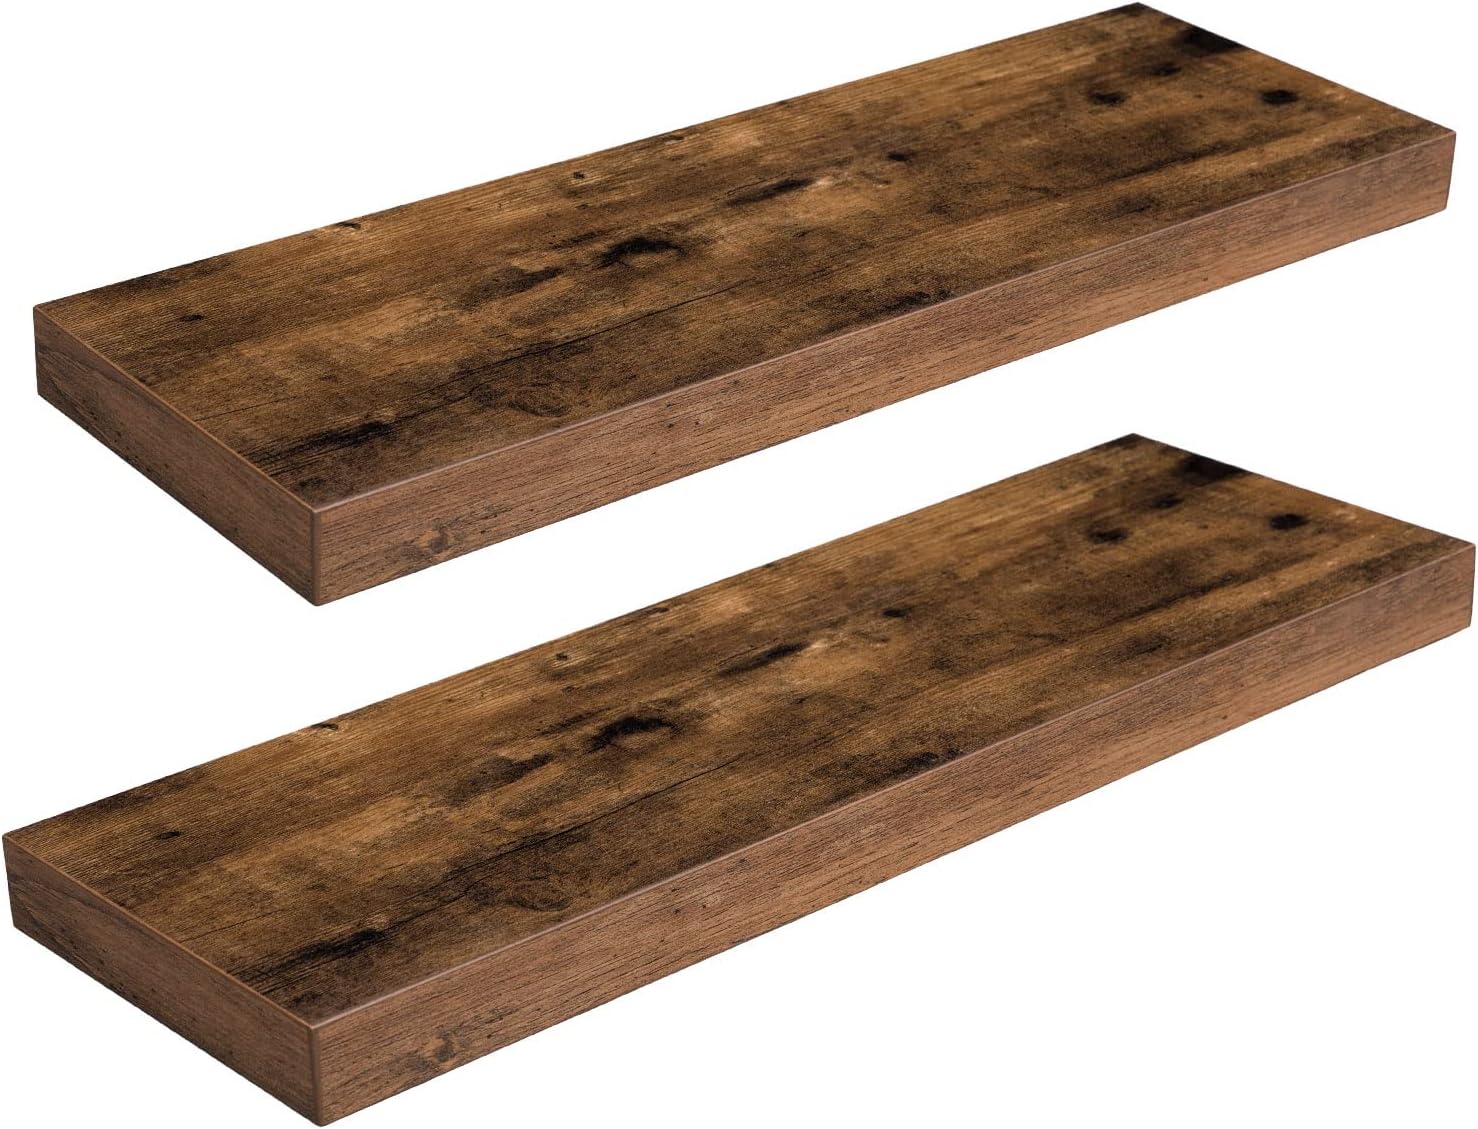
Wide-plank warm oak hardwood was laid from wall to wall, instantly transforming the look and feel of the entire kitchen. The warm tones set the foundation for the farmhouse aesthetic — everything from this point was built on top of this flooring choice.
Stage 6 — Paint & Trim: White Shiplap Walls
The walls were painted a clean bright white with shiplap detailing, and new baseboards were installed throughout. Painter’s tape came off to reveal crisp, clean lines everywhere. The kitchen went from a construction zone to a blank canvas ready for the final reveal.
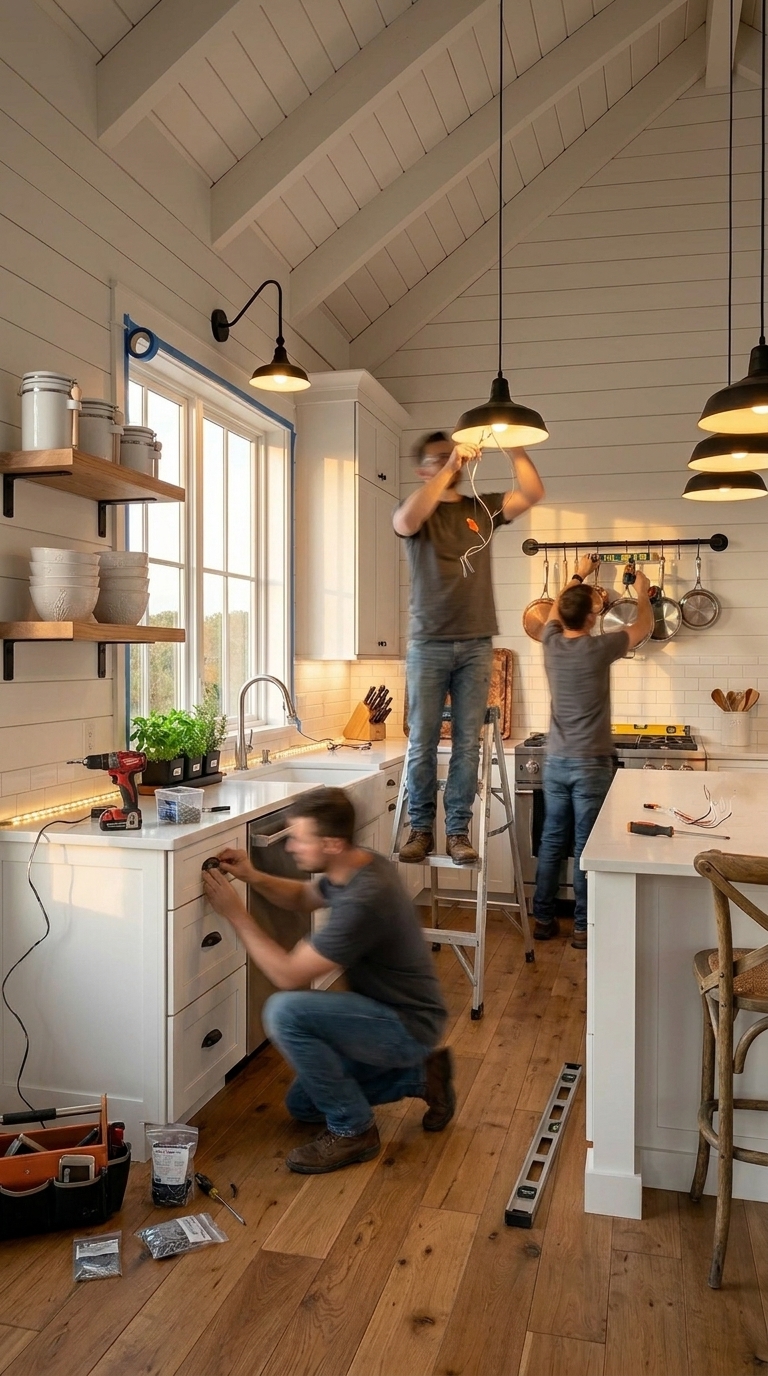
Stage 7 — Fixtures & Hardware: The Final Details
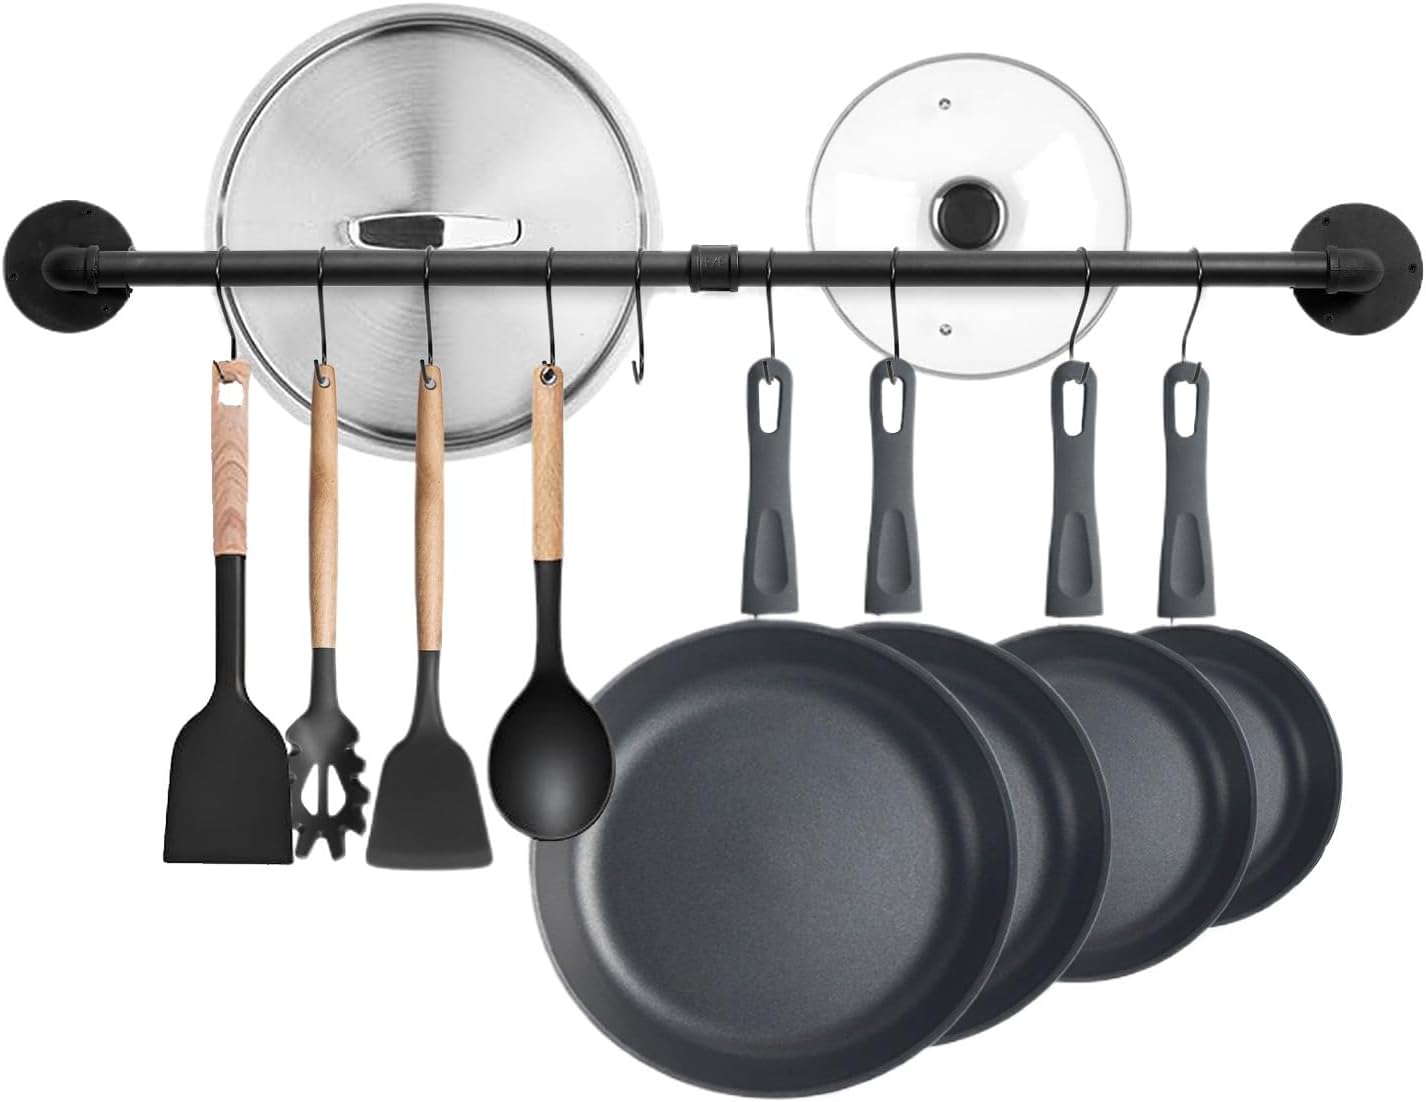
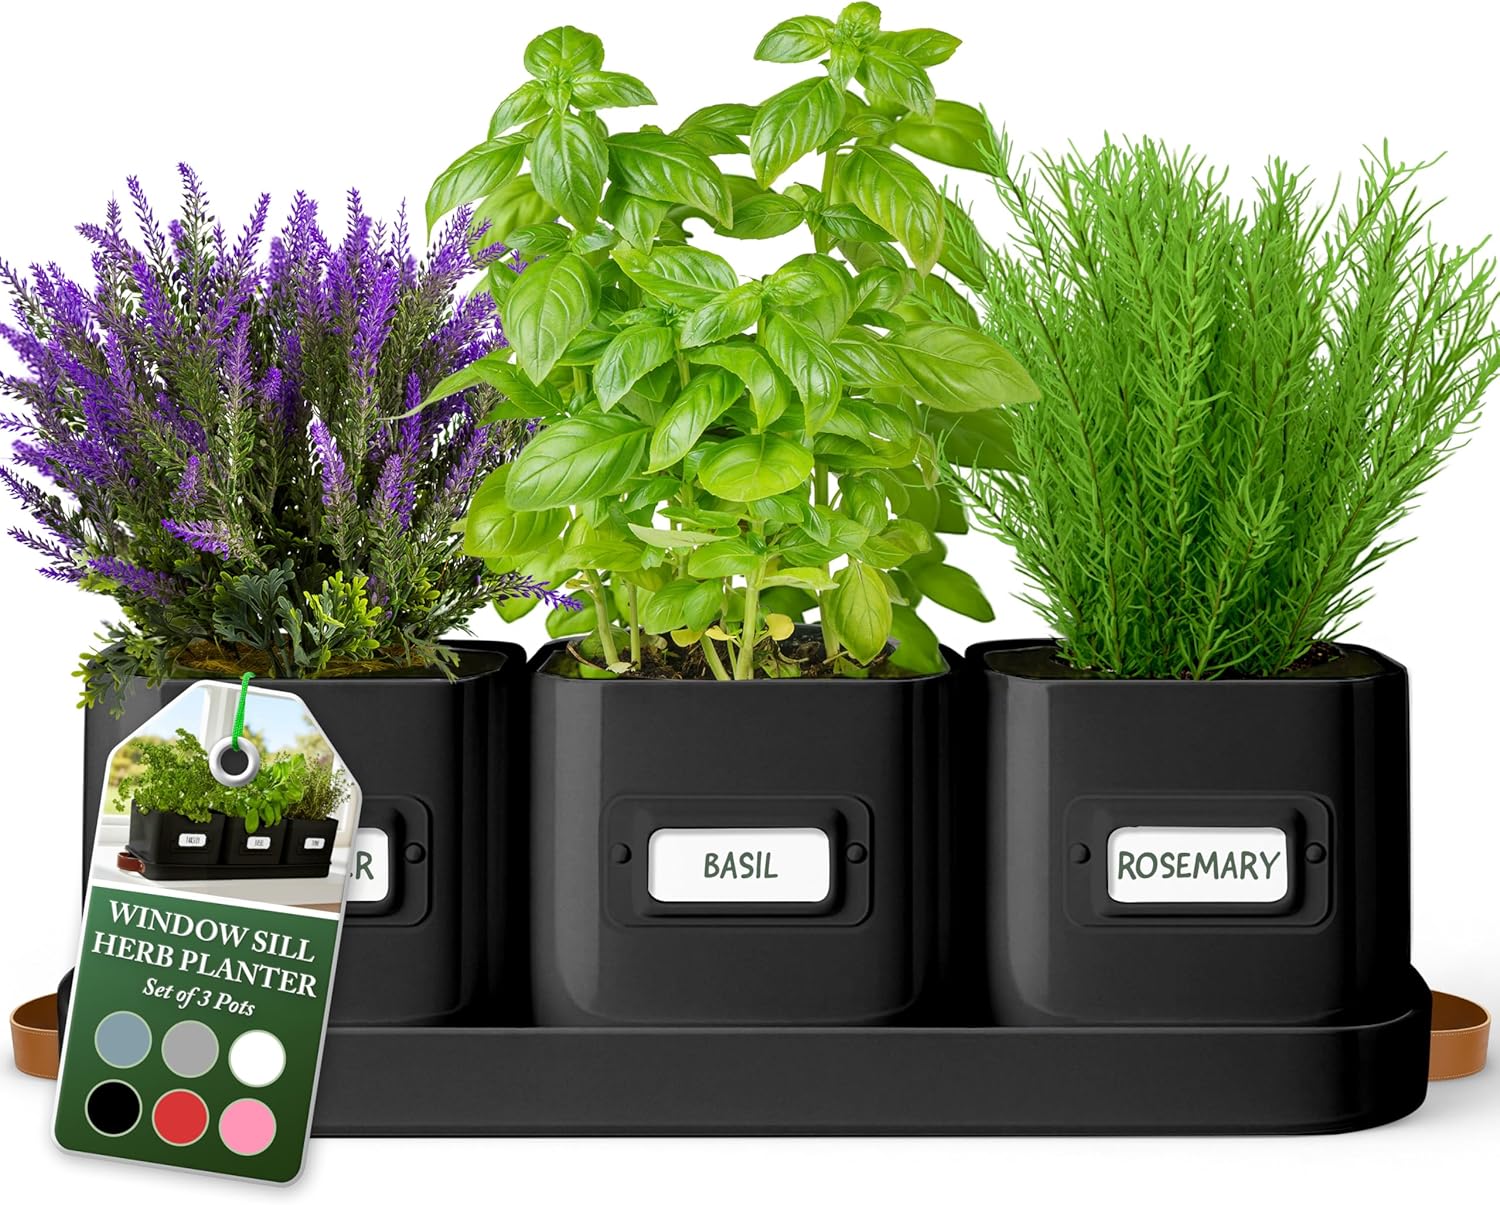
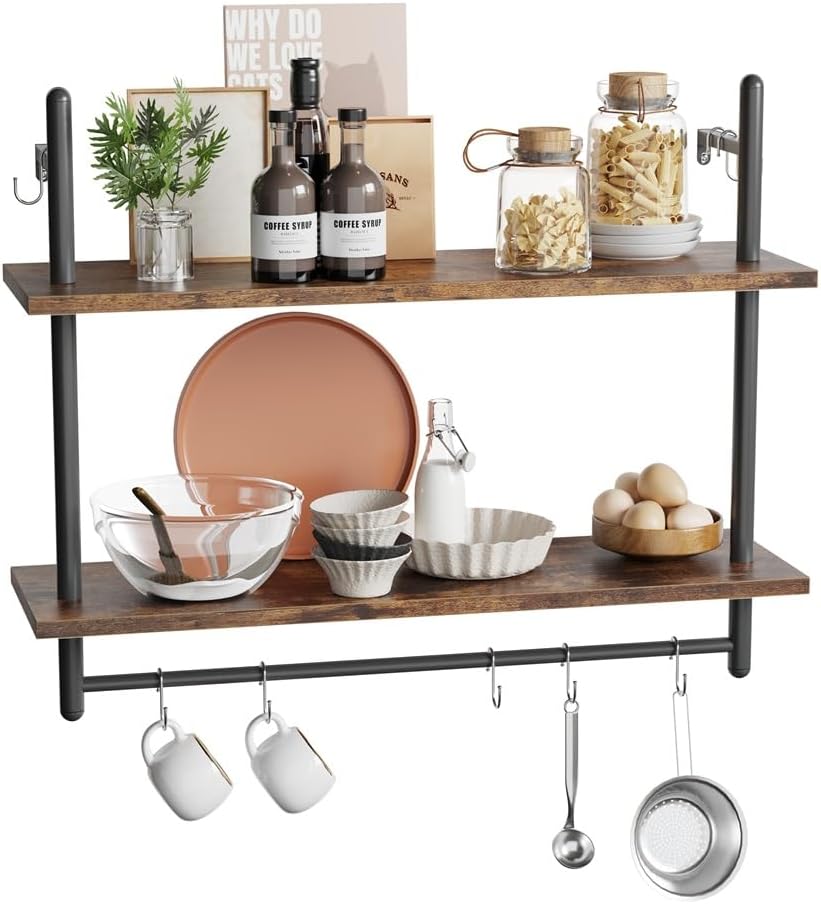
Black farmhouse pendant lights were wired and hung above the island. The wall-mounted pot rack was anchored to the shiplap. Cabinet hardware was installed, under-cabinet lighting was connected, and the herb planters were set in the windowsill. The very last step: peeling the painter’s tape to reveal perfect lines everywhere.
Design Tips for Open Shelving Kitchen Organization
Open shelving is one of those design choices that looks incredible when done right — and chaotic when done wrong. Here’s how to nail it every time.
Keep it curated, not cluttered. The number one rule with open shelves is that everything on them needs to earn its place. Limit each shelf to 5–7 items maximum. Group similar items together — all white ceramics on one shelf, all natural wood pieces on another.
Use the triangle rule. Arrange items in triangular groupings of varying heights. Tall canister on the left, medium bowl in the middle, short herb plant on the right. This creates visual rhythm that reads as intentional rather than random.
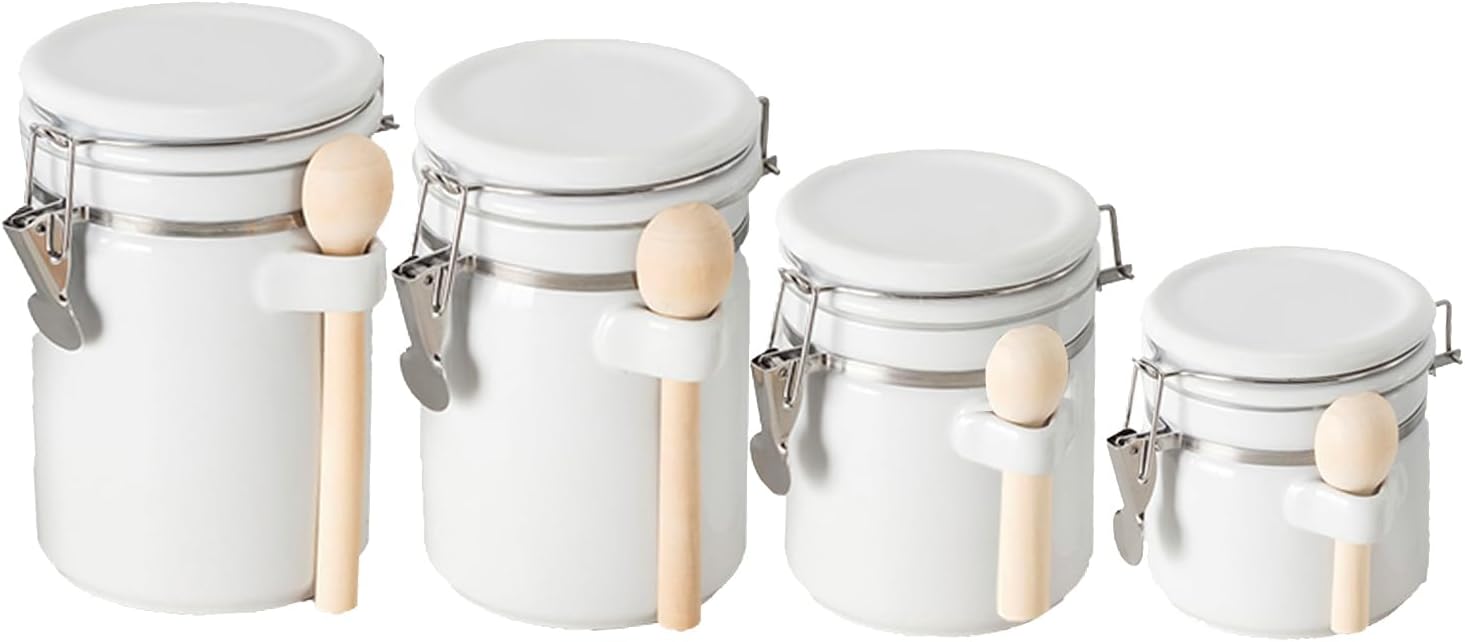
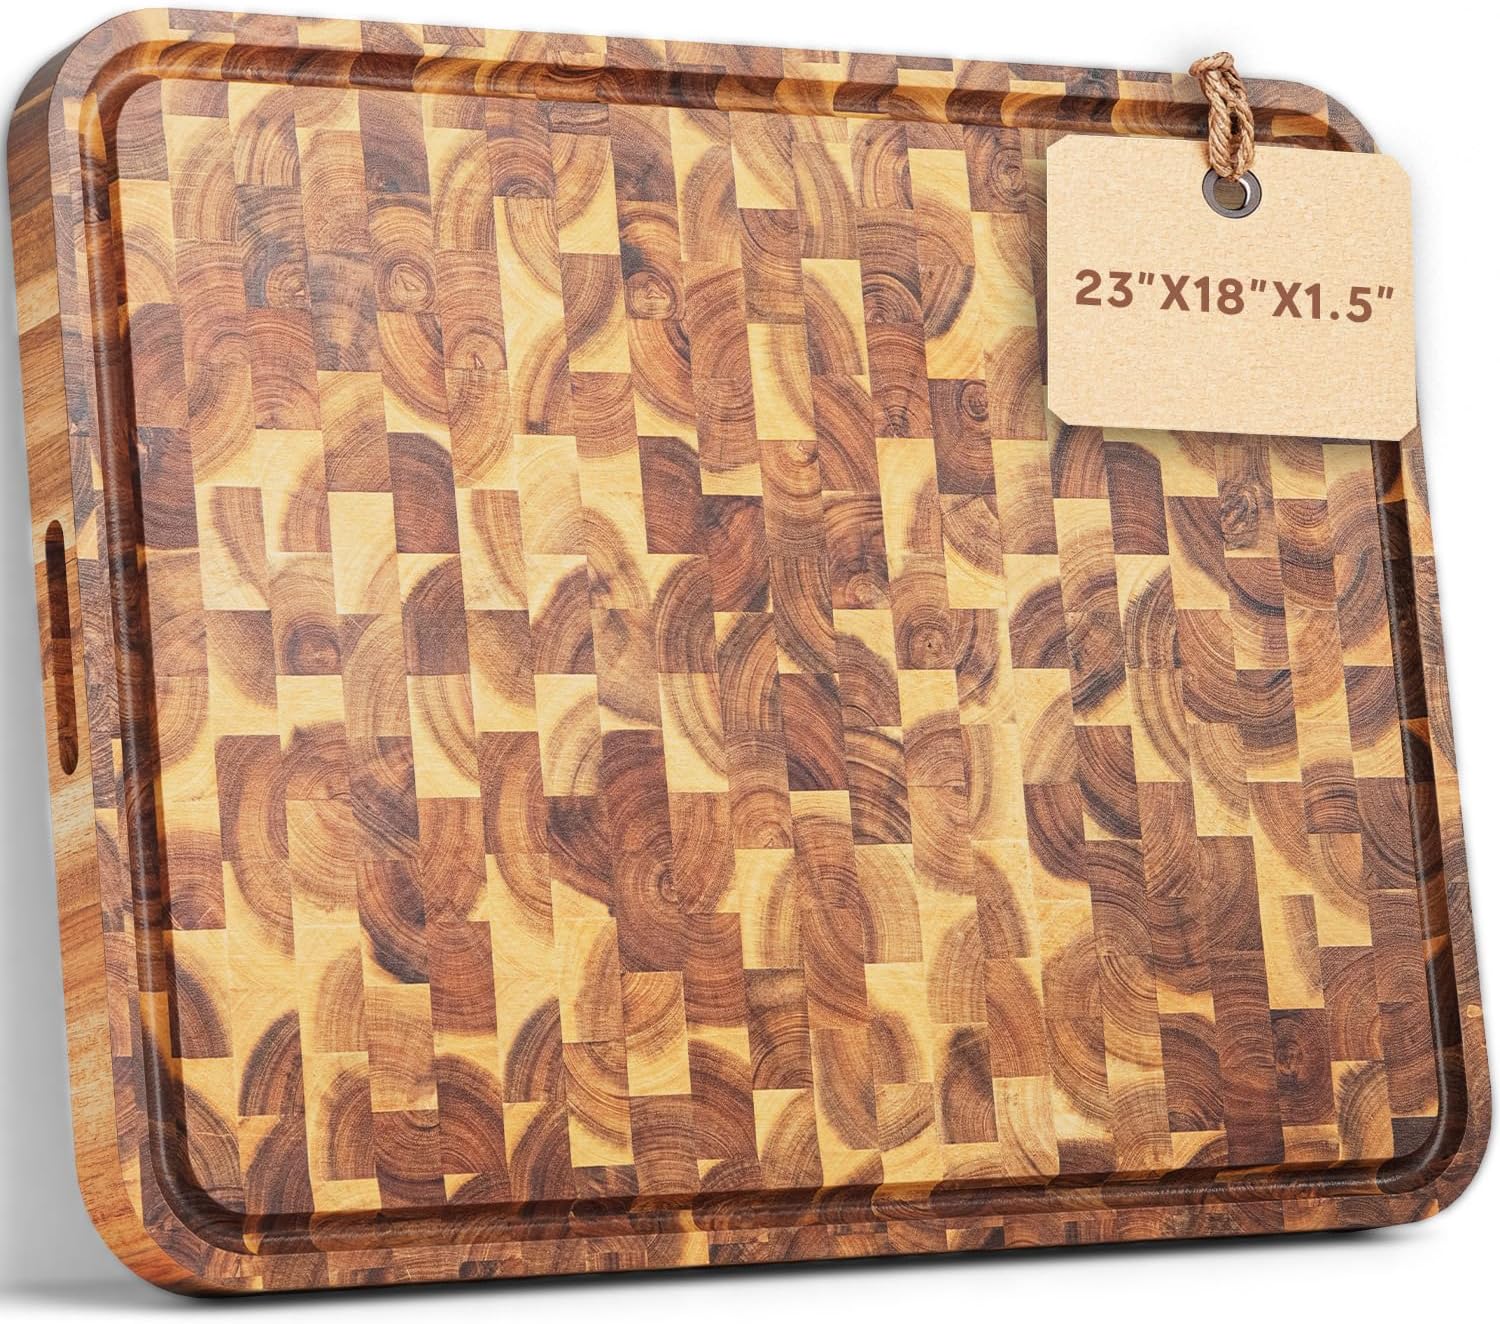
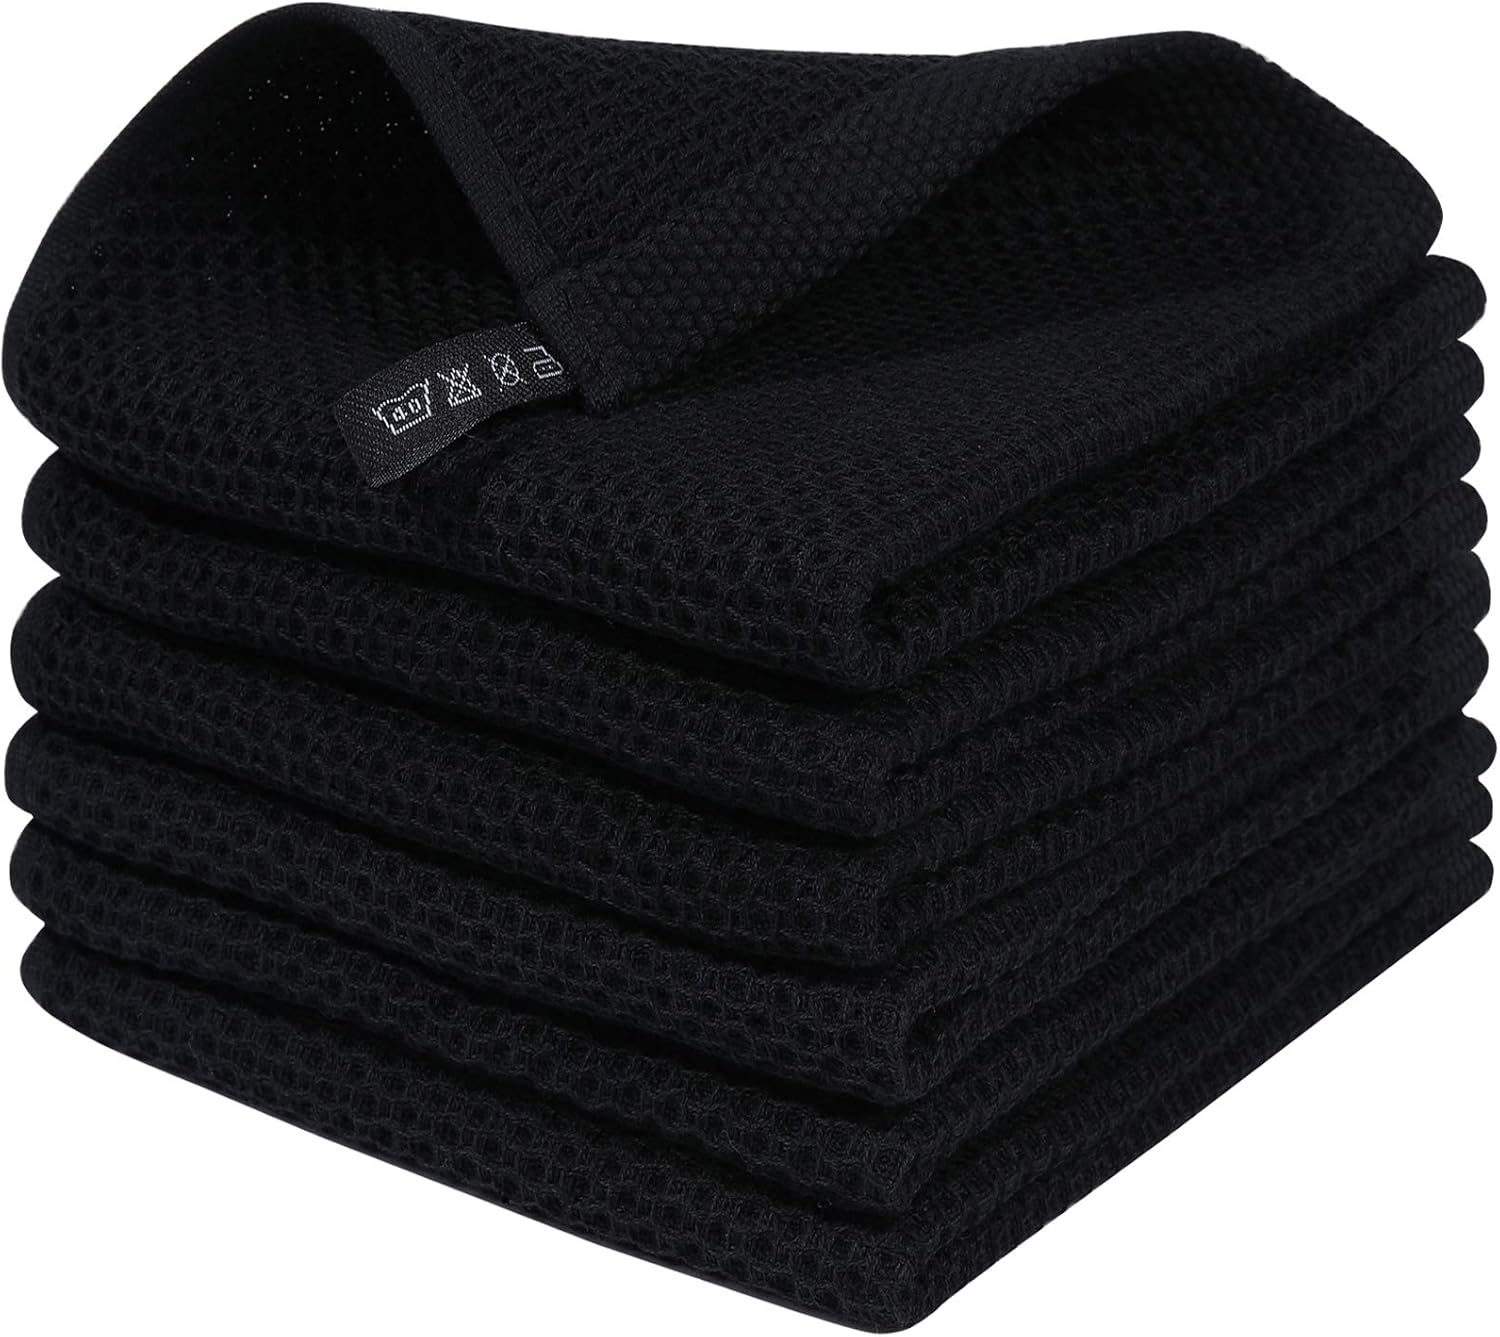
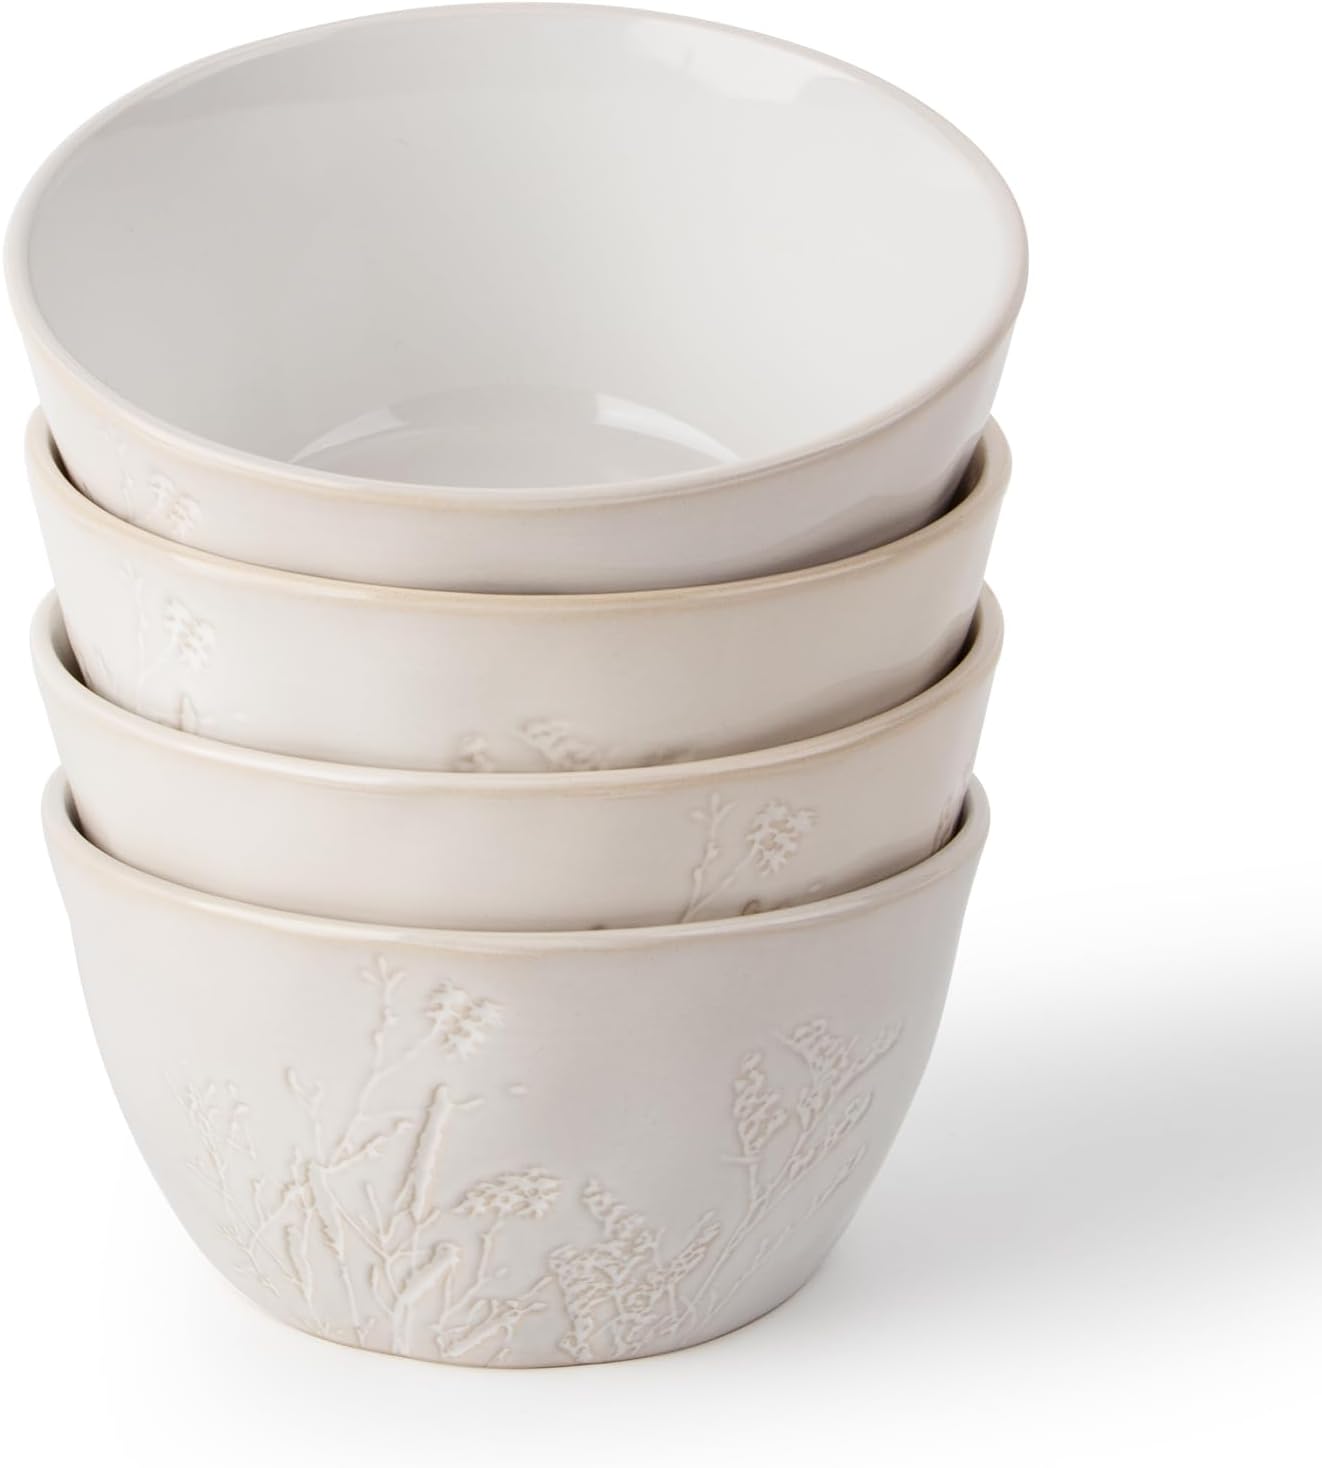
Stick to a tight color palette. In this kitchen, black metal (brackets, pot rack, herb planters, towels), white ceramic (canisters, bowls), and natural wood (cutting board, shelf boards) serve as the three-color rule. Every single item fits one of those three categories.
Layer textures, not colors. The richness in a farmhouse kitchen comes from mixing textures — rough acacia wood next to smooth ceramic, matte metal next to waffle-weave cotton. This adds depth without adding visual clutter.
Light the shelves. Under-cabinet LED strip lights make open shelving look like a boutique display. It’s a $30 upgrade that makes a $500 difference in how the kitchen photographs and feels at night.
Frequently Asked Questions
Is open shelving in the kitchen a good idea in 2026?
Yes — when done with intention. The key is keeping shelves styled and organized rather than using them as overflow storage. Open shelving works best in kitchens with a defined aesthetic (like modern farmhouse or minimalist) where every visible item reinforces the look. In 2026, designers recommend mixing open shelving with some closed storage rather than going fully open on all walls.
How do I keep open kitchen shelves organized and dust-free?
The best approach is to limit the number of items on shelves (fewer items = less dusting surface), choose items used regularly so they’re naturally cycled and wiped down, and do a quick weekly wipe-down with a microfiber cloth. Avoid storing items rarely used on open shelves — those belong in closed cabinets.
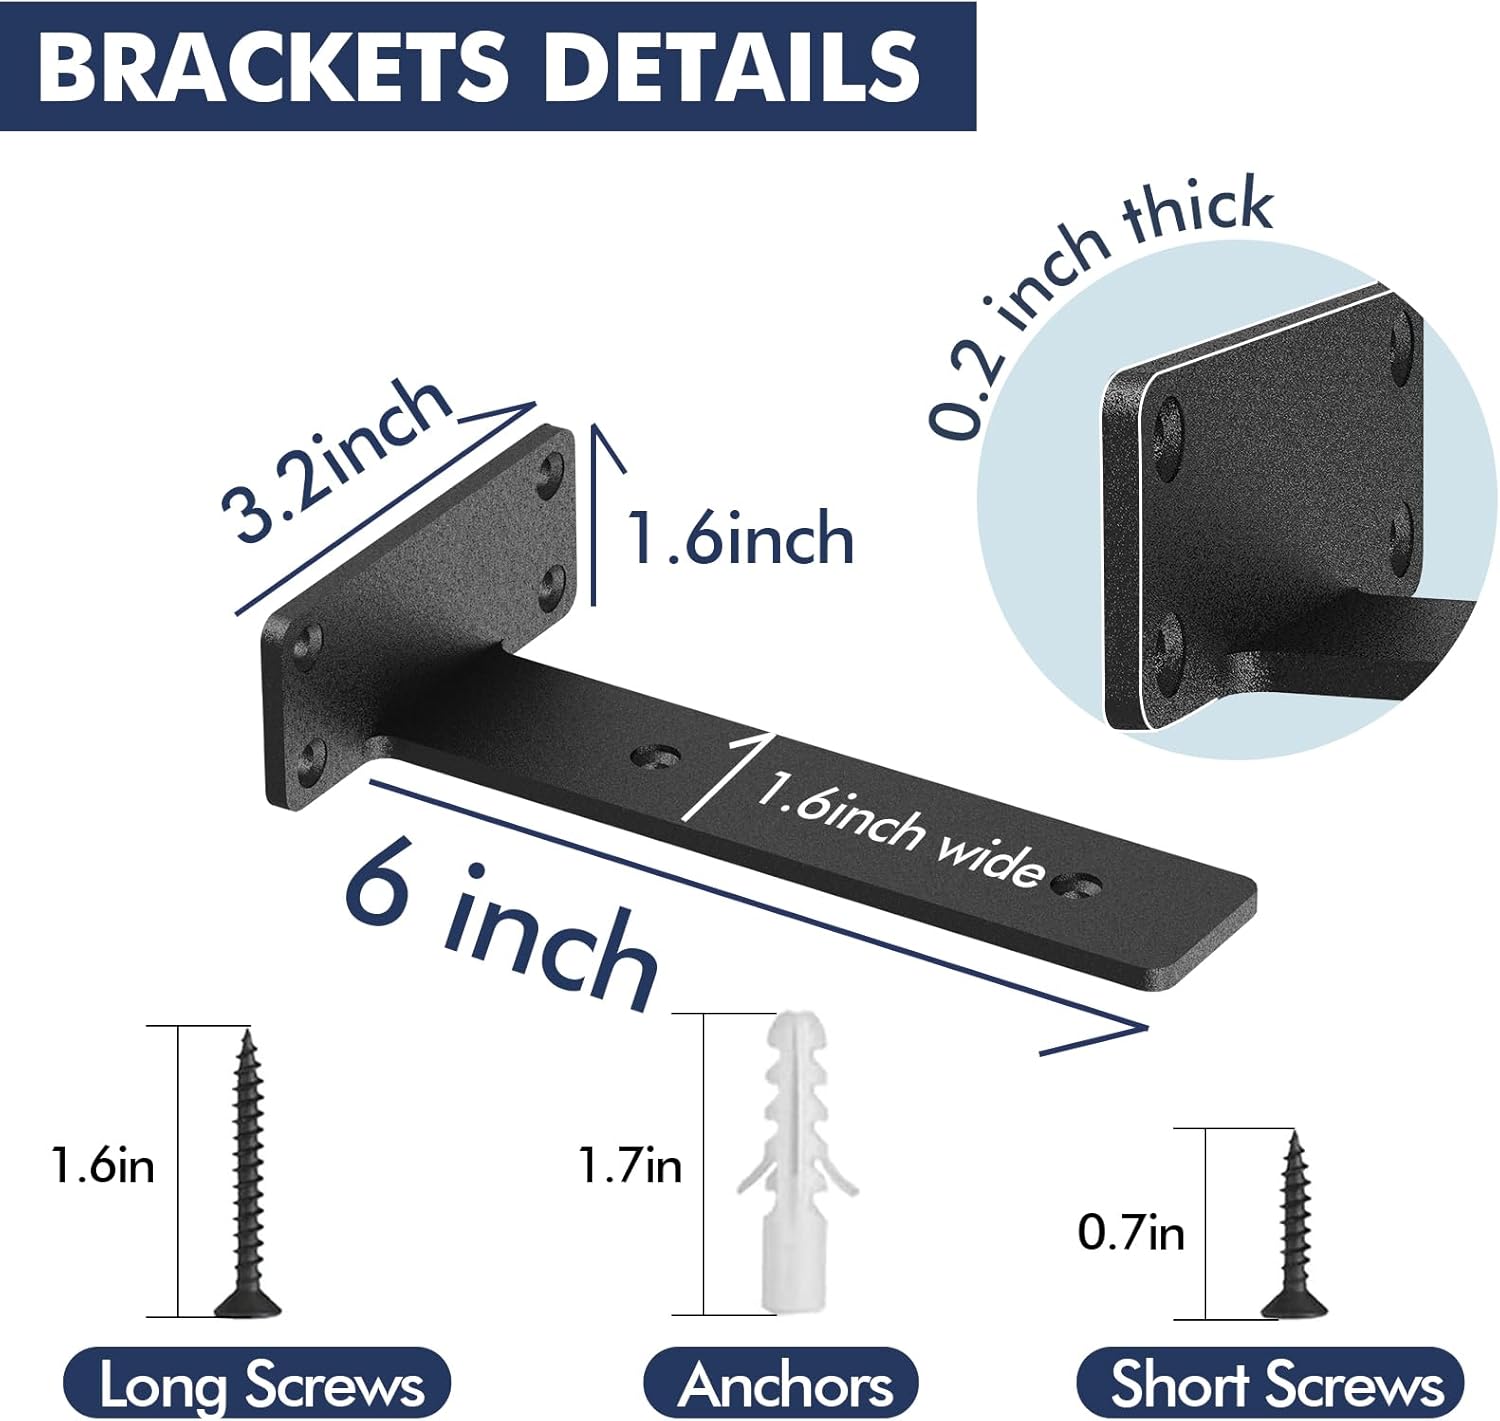
What brackets are best for floating kitchen shelves?
For a modern farmhouse look, heavy-duty black metal L-brackets are the go-to choice. They’re strong enough to hold significant weight (dishes, appliances) and the black metal color works beautifully against white shiplap or subway tile. Make sure to anchor into wall studs — not just drywall — for shelves that will hold real kitchen items.
How much does an open shelving kitchen renovation cost?
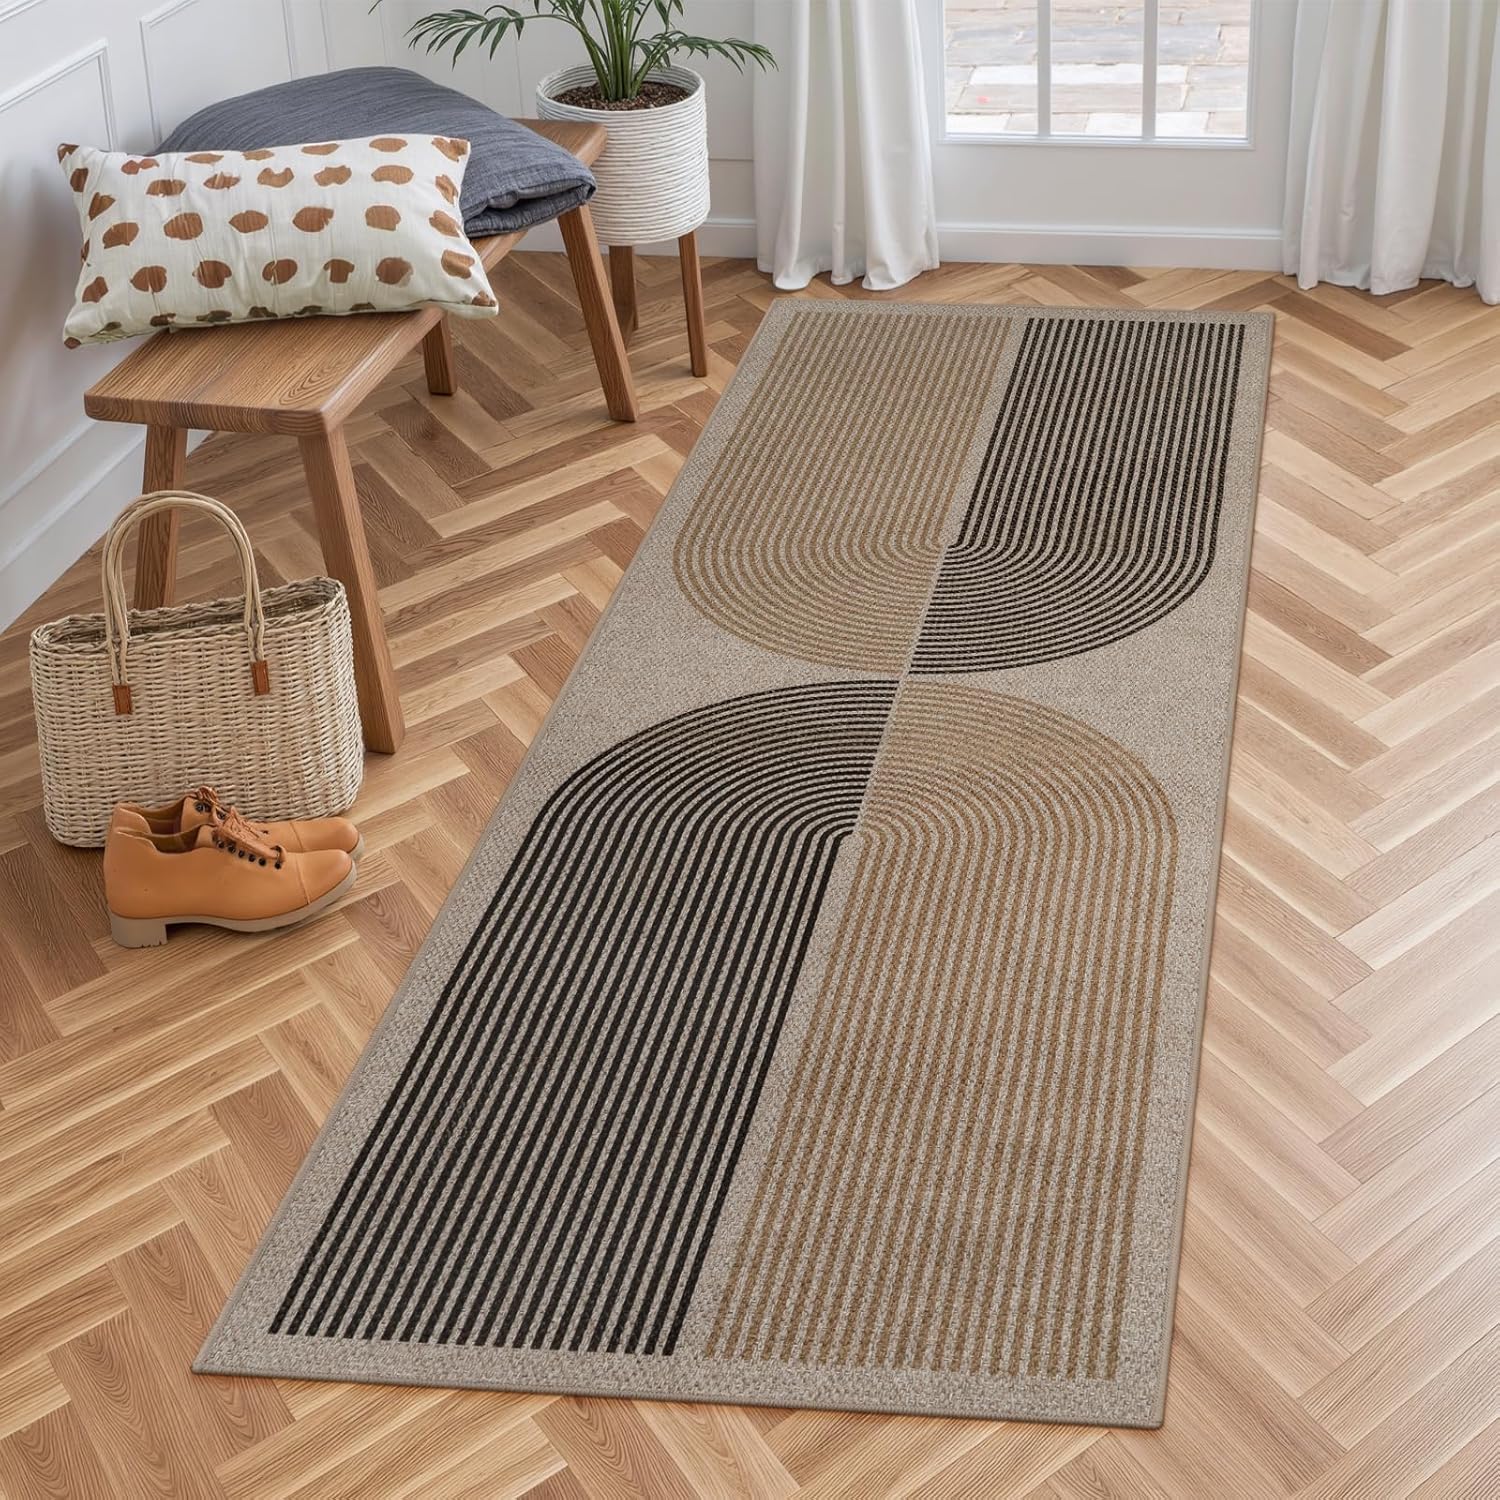
The product cost for this complete modern farmhouse kitchen styling came in under $800 total using Amazon. That covers the shelf brackets, canisters, cutting board, rug, pot rack, herb planters, towels, and bowls. Labor and structural renovation costs vary significantly by region and scope — the product styling portion is very achievable on a budget.
What should I put on open kitchen shelves?
The best open shelf items are things used regularly and that look good on display — ceramic canisters, stacked bowls, a large cutting board leaning against the wall, potted herbs, dish towels, and cookbooks. Avoid plastic containers, mismatched lids, cleaning supplies, and anything that would be embarrassing to show guests. If it doesn’t pass the “would this appear on Instagram” test, it goes in a cabinet.
Ready to Transform a Kitchen?
Open shelving kitchen organization is one of the highest-impact, lowest-cost upgrades available for any kitchen. The products used in this transformation are all available on Amazon with fast shipping, and every single one was chosen to work together as a cohesive modern farmhouse system. Start with the shelf brackets and one set of canisters — the look will immediately start to come together, and pieces can be added over time.
All the products from this transformation are linked in the Shop the Look section above. Happy renovating!

Leave a Reply