
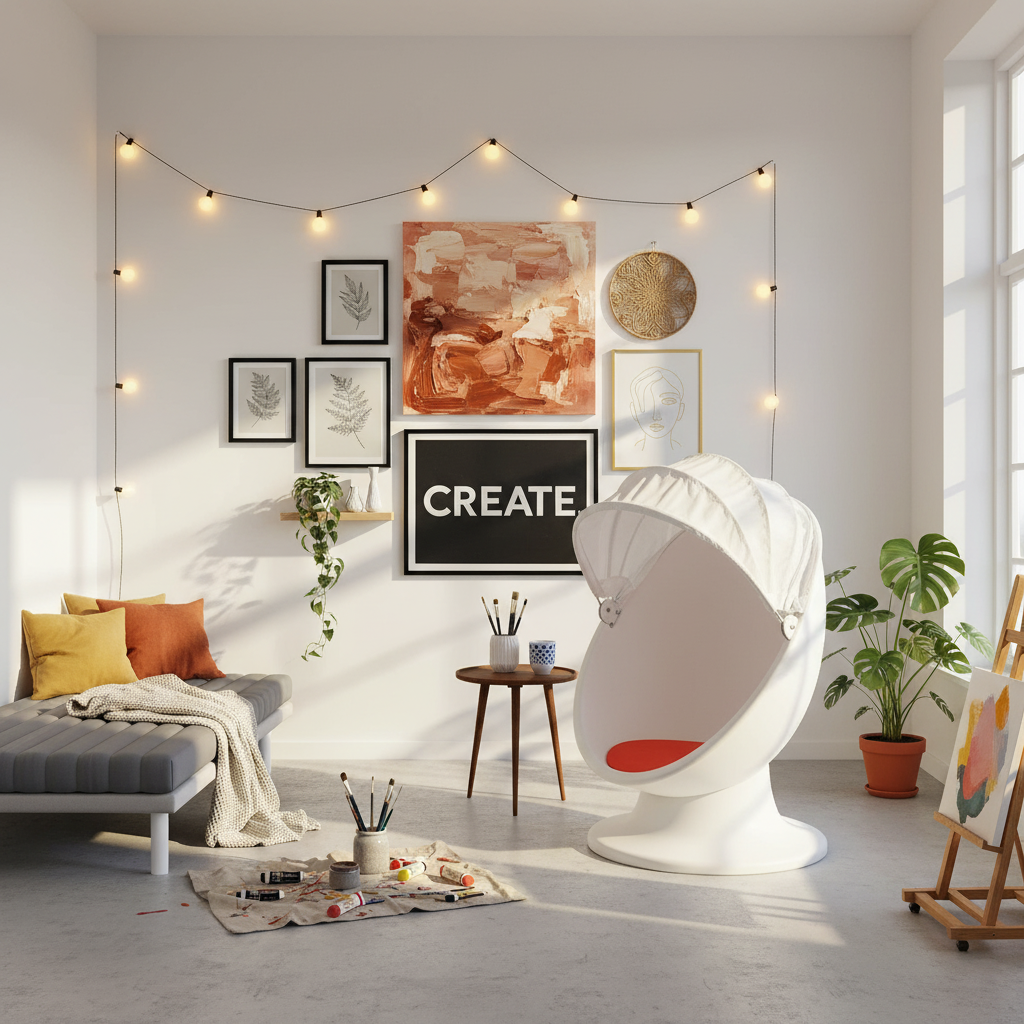
A blank wall does not need an expensive print or a full room renovation. The best DIY wall art ideas for a living room start with the size of the wall, repeat two or three colors already in the room, and use a finish that looks deliberate from across the space. This guide compares 15 realistic projects by cost, time, difficulty, and whether they work in a rental.
Use the table below to compare DIY wall art ideas for a living room by budget, time, skill, and rental suitability. Prices are planning ranges in US dollars, not product quotes. Reuse frames, fabric, leftover paint, and photographs you already own whenever possible.
Choose a project by budget and skill level
| DIY wall art idea | Estimated cost | Time | Difficulty | Rental-friendly? |
|---|---|---|---|---|
| Framed fabric or wallpaper | $5–$25 | 30–60 min | Easy | Yes |
| Black-and-white photo grid | $10–$35 | 1–2 hr | Easy | Yes |
| Pressed botanical frames | $8–$30 | 1 hr plus drying | Easy | Yes |
| Public-domain art prints | $10–$40 | 1 hr | Easy | Yes |
| Paint-chip color study | $5–$20 | 1–2 hr | Easy | Yes |
| Minimal line-art series | $8–$25 | 1–2 hr | Easy | Yes |
| Thrifted-frame gallery wall | $20–$70 | 2–4 hr | Easy | Usually |
| Large abstract canvas | $25–$65 | 2–3 hr | Easy | Yes |
| Textured plaster-look canvas | $25–$60 | 2 hr plus drying | Medium | Yes |
| Woven-yarn wall hanging | $15–$45 | 3–5 hr | Medium | Yes |
| Air-dry clay relief | $15–$40 | 2 hr plus drying | Medium | Yes |
| Wood-slat geometric panel | $25–$70 | 3–5 hr | Medium | With proper hooks |
| Floating-shelf art ledge | $25–$80 | 1–3 hr | Medium | No |
| Painted wall arch | $20–$55 | 3–4 hr | Medium | Only if repainting is allowed |
| Oversized typography panel | $15–$50 | 2–3 hr | Medium | Yes |
Before you begin: size the art to the wall
Measure the empty wall and the furniture below it before buying supplies. Above a sofa or console, aim for an artwork or grouping that is roughly two-thirds to three-quarters of the furniture width. Leave about 6–10 inches between the furniture and the bottom of the art so the two elements read as one arrangement.
For an open wall, start with the visual center of the artwork around eye level, then adjust for the ceiling height and the way the room is used. When testing DIY wall art ideas for a living room, make a paper template for every frame or panel and tape the templates to the wall. This inexpensive rehearsal exposes spacing problems before the first hole is made.
15 DIY wall art ideas for a living room
1. Frame a fabric remnant or wallpaper sample
Materials: frame, fabric or wallpaper sample, scissors, acid-free tape, and backing board.
- Iron fabric on low heat or flatten wallpaper under books.
- Cut it 1–2 inches larger than the frame opening.
- Wrap it around the backing board and secure it on the back.
- Repeat the same fabric in two or three frames for a larger composition.
This works especially well when the pattern repeats a color from the rug or pillows. A wide off-white mat makes a small sample feel more substantial.
2. Build a black-and-white photo grid
Materials: 9 or 12 personal photos, matching prints, removable photo corners, ruler, and level.
- Convert the photos to the same black-and-white treatment.
- Print every image at the same size.
- Lay out a three-column grid on the floor.
- Transfer the layout to the wall with equal gaps of about 2 inches.
Matching the crop and print finish creates cohesion even when the photographs come from different years.
3. Make pressed botanical art
Materials: flat leaves or flowers, absorbent paper, heavy books, archival glue dots, paper, and frames.
- Press dry plant material between sheets of paper for one to two weeks.
- Arrange each specimen with generous empty space around it.
- Secure it with small archival glue dots.
- Label the plant and date in pencil for a collected, personal look.
Avoid picking protected plants, and make sure every specimen is fully dry before framing.
4. Print public-domain museum art
Materials: high-resolution public-domain files, matte paper, frames, and optional mats.
Collections such as National Gallery of Art Open Access provide downloadable images that can be reused. Choose three works with a shared color, subject, or period, then print them at standard frame sizes. Check the usage statement for every image before downloading.
5. Create a paint-chip color study
Materials: paint samples or colored cardstock, craft knife, metal ruler, glue stick, and poster board.
- Select five to seven shades from the room’s existing palette.
- Cut identical squares or rectangles.
- Arrange them as a gradient or geometric pattern.
- Glue them to sturdy white board and place the composition in a simple frame.
Keep the edges precise. Clean spacing is what makes inexpensive paper look intentional.
6. Draw a minimal line-art series
Materials: heavyweight paper, pencil, black archival marker, and three matching frames.
- Sketch each design lightly without filling the entire page.
- Trace one continuous line with the marker.
- Let the ink dry completely before erasing pencil marks.
- Frame the series with the same mat width.
A three-piece series is easier to balance above a sofa than one undersized drawing.
7. Assemble a thrifted-frame gallery wall
Materials: five to nine thrifted frames, primer, matte spray paint, paper templates, and suitable hanging hardware.
- Remove the glass and hardware before painting.
- Unify mismatched frames with one finish, such as matte black or warm wood.
- Arrange a large anchor piece first and build outward.
- Keep 2–3 inches between frames.
Mix photographs, small paintings, typography, and textiles, but repeat at least one color across the collection.
8. Paint one oversized abstract canvas
Materials: large canvas, acrylic paint, two wide brushes, drop cloth, and matte medium.
- Choose a light base color and two accent colors from the room.
- Block in the largest shape first.
- Add one or two smaller gestures while the paint is still workable.
- Stop before every empty area is filled.
Large shapes and a limited palette usually look calmer from across a living room than many small marks.
9. Make a textured plaster-look canvas
Materials: rigid canvas board, lightweight texture paste made for artwork, palette knife, primer, and water-based paint.
- Prime the board and let it dry.
- Spread a thin layer of texture paste.
- Create broad arcs or ridges with the palette knife.
- Allow it to cure according to the product instructions, then paint it in one or two matte tones.
Use an art product intended for the surface rather than applying construction compound to a flexible canvas.
10. Weave a simple yarn wall hanging
Materials: wooden dowel, cotton cord, yarn in three textures, scissors, and measuring tape.
- Cut equal lengths of cord and loop them over the dowel.
- Add sections of thicker yarn for contrast.
- Tie simple square knots or wrap groups of strands.
- Trim the bottom into a shallow V or straight line.
Natural fibers add softness above a hard-edged console or media cabinet.
11. Form an air-dry clay wall relief
Materials: air-dry clay, rolling pin, craft knife, fine sandpaper, acrylic paint, and a shadow-box frame.
- Roll the clay to an even thickness.
- Cut several organic shapes and add shallow lines or impressions.
- Dry the pieces flat, turning them if the manufacturer recommends it.
- Sand rough edges and mount the pieces inside a shadow box.
Keeping the clay inside a frame is safer than attaching brittle pieces directly over a seating area.
12. Build a geometric wood-slat panel
Materials: thin craft wood, backing board, wood glue, small saw or pre-cut pieces, sandpaper, and paint or stain.
- Draw the design on the backing board.
- Dry-fit every piece before gluing.
- Sand cut edges and apply the finish.
- Glue the pattern and add a hanging system rated for the finished weight.
Wear eye protection while cutting and follow the tool manufacturer’s safety guidance.
13. Install a rotating art ledge
Materials: picture ledge, level, stud finder, approved wall anchors, and a mix of lightweight frames.
- Locate studs and check for nearby electrical or plumbing lines.
- Install the ledge level using hardware appropriate for the wall.
- Lean the largest frame at the back.
- Layer smaller pieces in front without covering important details.
An art ledge allows the display to change seasonally without making new holes for every frame.
14. Paint a wall arch behind existing art
Materials: interior paint, painter’s tape, pencil, string, small roller, and angled brush.
- Mark the vertical sides with a level.
- Use a pencil tied to string to draw the curved top.
- Cut in along the curve with a small brush.
- Roll two thin coats inside the shape.
Test the paint color on the wall first. Renters should obtain permission before painting.
15. Create an oversized typography panel
Materials: plywood or rigid art board, primer, paint, letter stencil or projector, and hanging hardware.
- Choose one short word or phrase that is meaningful to the household.
- Prime the board and paint the background.
- Center the lettering and apply it in thin coats.
- Seal it with a matte water-based finish if the paint requires protection.
Use fewer words and larger type. A short message remains readable across the room and avoids looking like a poster.
How to make inexpensive wall art look finished
- Repeat a palette: select two or three colors already present in the rug, upholstery, or curtains.
- Use consistent spacing: uneven gaps make a gallery wall look accidental.
- Choose matte finishes: matte paper and paint reduce glare from windows and lamps.
- Respect scale: one large piece often fills a wall more successfully than several tiny objects.
- Finish the edges: paint exposed canvas edges, sand wood, and hide loose threads or adhesive.
If the room needs a broader palette before selecting art, use the Housify home color-palette guide. For a warmer handmade look, compare these ideas with the boho living-room wall decor guide. A restrained arrangement also works well with the neutral materials in our Scandinavian living-room guide.
Hang wall art safely
Weigh the finished piece, then use hooks, anchors, or adhesive strips rated by the manufacturer for both that weight and the wall surface. Drywall, plaster, masonry, and wood paneling require different hardware. Do not hang heavy or glass-fronted art above a sofa using adhesive strips alone. If drilling could reach wiring or plumbing, stop and locate those services first or use a qualified professional.
For rental-friendly installations, use lightweight frames, a picture ledge that is already installed, or removable products specifically approved for the surface. Follow the removal instructions; pulling an adhesive strip outward instead of slowly stretching it can damage paint.
Frequently asked questions
What is the easiest DIY wall art for a beginner?
Framed fabric, public-domain prints, and a black-and-white photo grid require no drawing or woodworking. The main work is measuring, trimming, and keeping the spacing consistent.
How much should DIY living-room wall art cost?
A small framed project can cost under $20 when an existing frame is reused. A large canvas, multi-frame gallery wall, or wood panel commonly costs $25–$80. Set the maximum budget before selecting the format because framing can cost more than the artwork itself.
How large should art be above a sofa?
A useful starting point is a piece or grouping about two-thirds to three-quarters of the sofa width, positioned roughly 6–10 inches above it. Test the size with taped paper templates and adjust for the ceiling height and furniture proportions.
How can I make a gallery wall cohesive?
Repeat one frame finish, one color family, or one subject across the arrangement. Place the largest piece first, keep the gaps consistent, and mix portrait and landscape orientations around that anchor.
What can I put in frames besides prints?
Fabric remnants, wallpaper samples, postcards, children’s drawings, pressed botanicals, maps, sheet music, handwritten recipes, and flat keepsakes can all become personal wall art. Use acid-free materials for anything you want to preserve.
Start with the wall, not the shopping cart
Measure the wall, choose one project that fits the available time, and make a full-size paper template before buying supplies. That simple order prevents the two most common mistakes: artwork that is too small and a collection that does not relate to the room. One well-scaled, carefully finished project can give the living room more personality than a cart full of unrelated decor.
[…] For more detailed color testing, use the Housify home color-palette guide. If the room needs wall decor after the furniture plan is fixed, compare the available wall width with these DIY wall art ideas for a living room. […]
[…] creating art is preferable to buying it, use these DIY wall art ideas for a living room to compare project size, cost, time, and renter […]