Small bathrooms have a reputation for being frustrating — never enough room, never enough storage, and never quite feeling like the spa retreat deserved. But the truth is, a small bathroom doesn’t have to mean a cluttered, chaotic space. With the right floor-standing storage cabinets and smart organization strategy, even the tiniest bathroom can feel organized, luxurious, and completely under control.
This guide shows exactly how to transform a small bathroom from an abandoned, storage-starved shell into a beautifully organized space with purpose-built storage at every turn. Floor-standing cabinets, a wall-mount LED medicine cabinet, natural wicker baskets, and brushed gold hardware — all sourced directly from Amazon — create a bathroom that looks like it belongs in a boutique hotel. The full renovation journey is documented step by step, with pictures.
Whether completing a full gut renovation or just looking for smart storage solutions to add to an existing bathroom, this guide has everything needed. For even more budget bathroom remodel ideas, check out our complete black, white, and gray transformation guide. Let’s get into it.
Shop the Look
Recreate this organized small bathroom with these handpicked Amazon products.
The Full Small Bathroom Renovation Journey
Every organized, beautiful bathroom starts with a plan — and sometimes a sledgehammer. Here’s the complete before-to-after story of this small bathroom transformation, from cracked tiles and bare pipes to a fully organized, spa-worthy retreat.
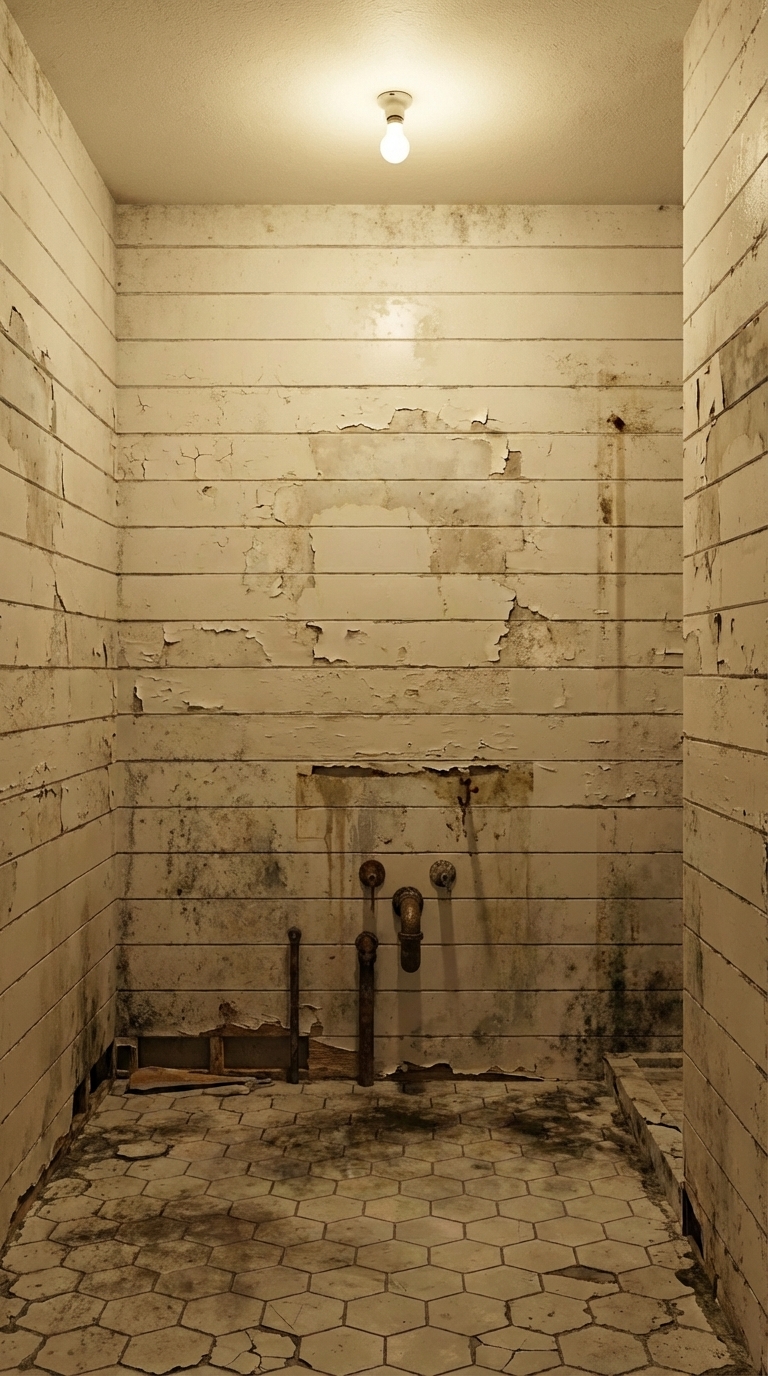
Stage 1 — The Before: Empty & Abandoned
This is where every great renovation begins — the honest before. Cracked hexagonal floor tiles with stained grout, peeling shiplap walls, a bare bulb casting harsh shadows, and exposed pipes where fixtures used to be. The room felt cramped not because of its actual size, but because of the chaos. With no storage, no organization, and no design intent, even small items had nowhere to go. The bones were solid though — a workable footprint, good ceiling height, and a shower already roughed in on the right wall.
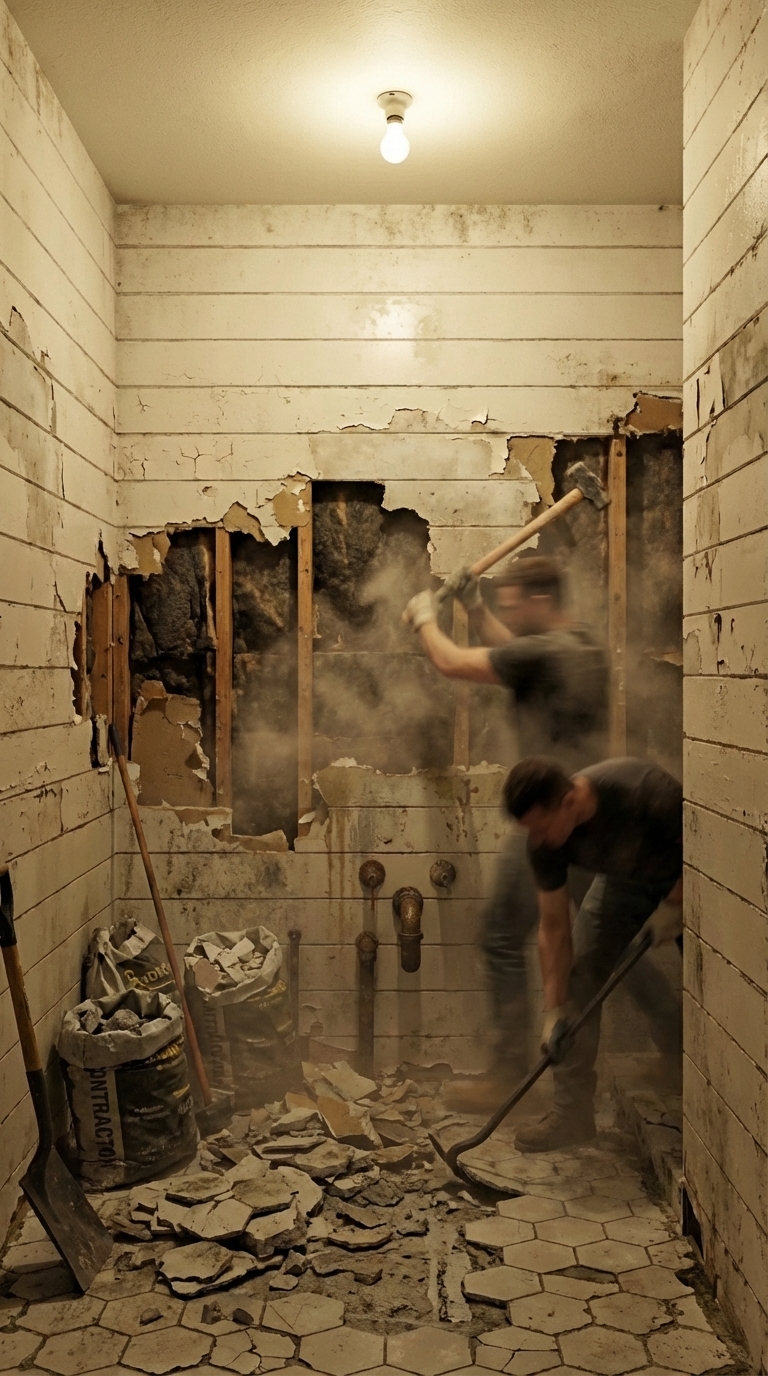
Stage 2 — Demolition
Out with everything. Workers stripped the cracked floor tiles down to bare concrete, knocked off the damaged shiplap panels to expose the wall studs, and cleared out every last trace of the old space. Dust clouds, broken tile pieces, and the clean crack of a crowbar — this is the most satisfying stage of any renovation. Nothing left but the raw structure and a blank canvas ready for a completely fresh start.
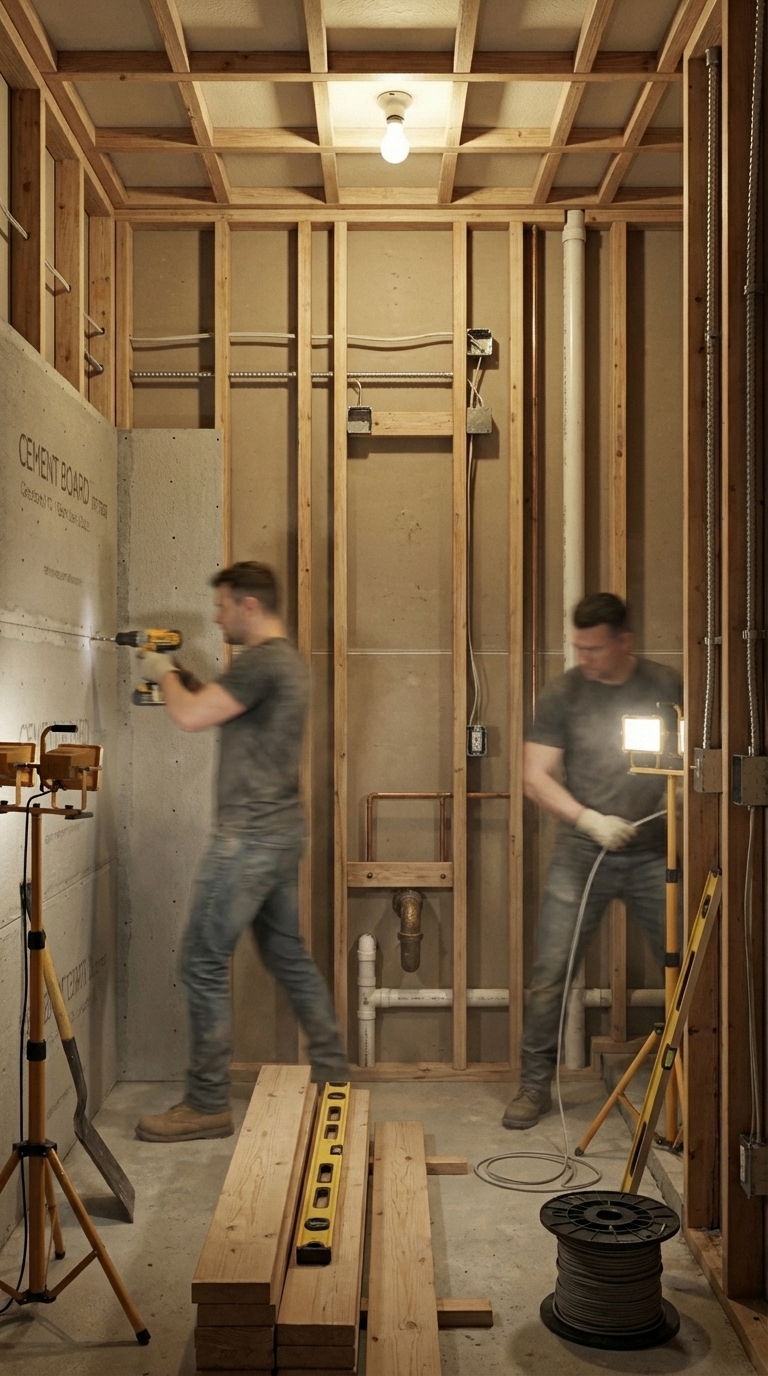
Stage 3 — Structural Framing & Rough-In
With the room gutted, the structural work began. New wall studs were erected, electrical conduit was run for the LED medicine cabinet and recessed ceiling lights, and copper plumbing was roughed in for the vanity sink. Cement board went up in the shower area. At this stage the transformation is purely structural — invisible once finished, but absolutely essential for everything that comes next.
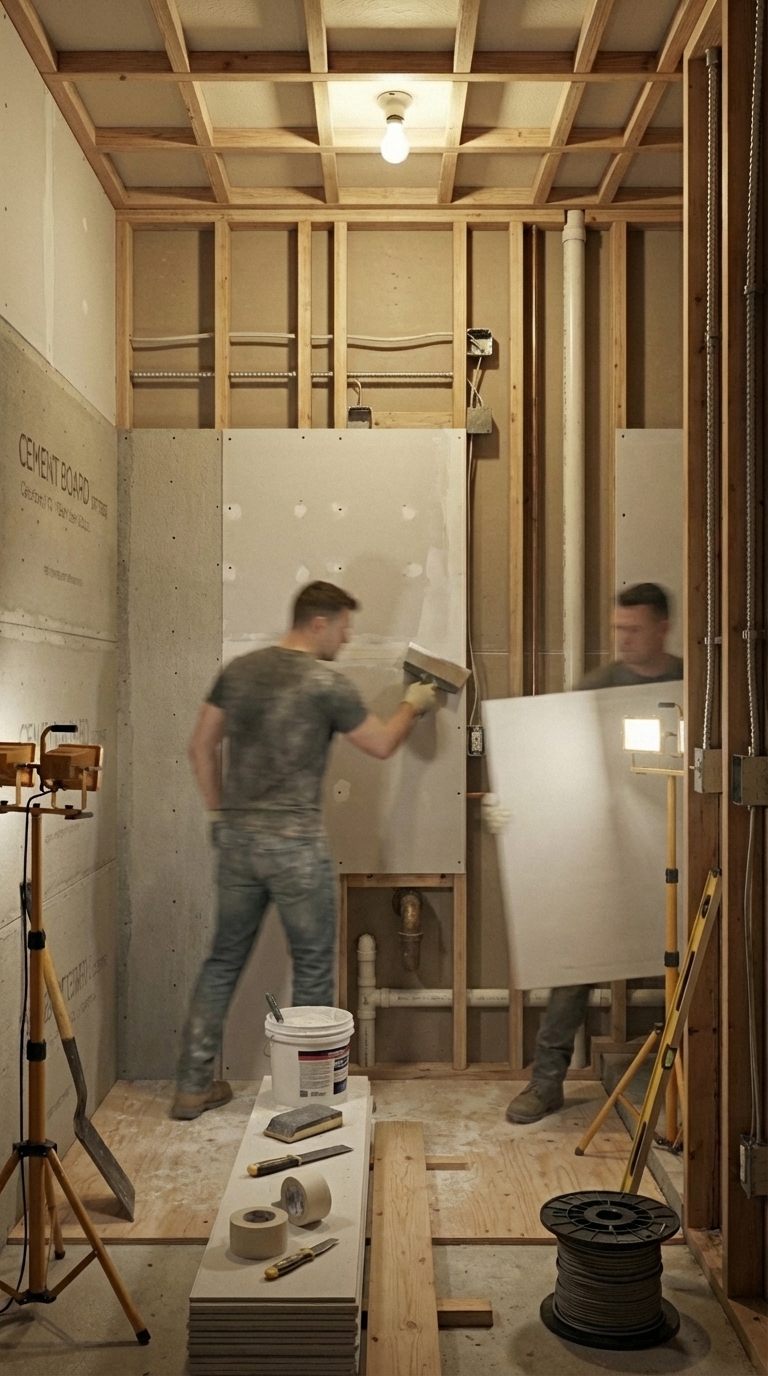
Stage 4 — Drywall & Cement Board
The walls began closing up with fresh drywall and cement board panels. Seams were taped and mudded smooth, screw dimples filled. The subfloor was leveled and prepped for the new hexagonal tile. The bathroom was starting to feel like a real room again — enclosed, structured, and ready for its new skin.
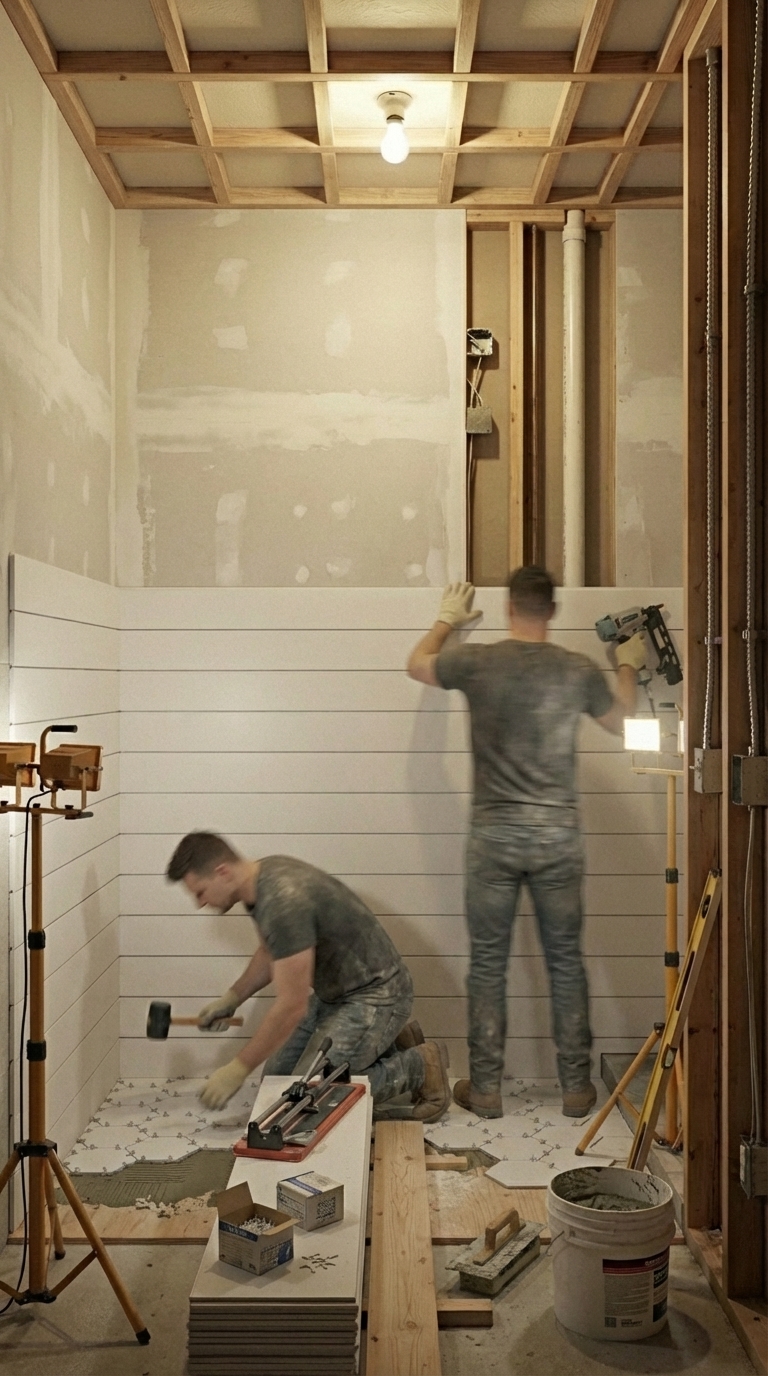
Stage 5 — Flooring & Wall Shiplap
This is where the character of the space truly emerged. Fresh white shiplap panels went up on all walls, row by row, bringing that warm cozy texture that makes small spaces feel intentional rather than cramped. On the floor, new hexagonal white tiles were laid in a clean grid with precision spacing. The transformation from construction site to styled bathroom was unmistakable at this stage.
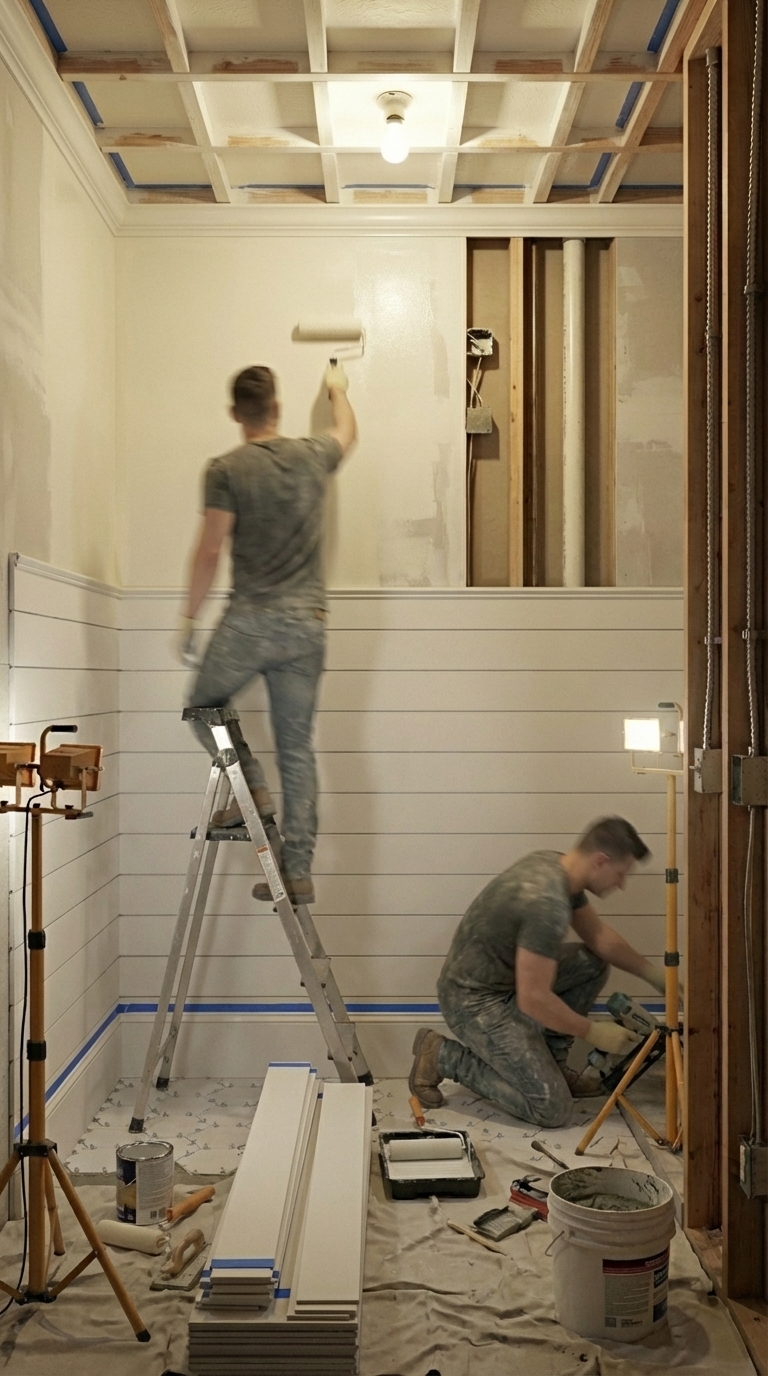
Stage 6 — Paint & Trim
With the surfaces complete, the ceiling was painted a warm creamy white to complement the shiplap walls. New white baseboards were nailed along the floor line, and crown molding was added at the ceiling for a polished, finished feel. Painter’s tape came off the edges to reveal crisp, clean lines throughout. The room was 85% complete — and already looking stunning.
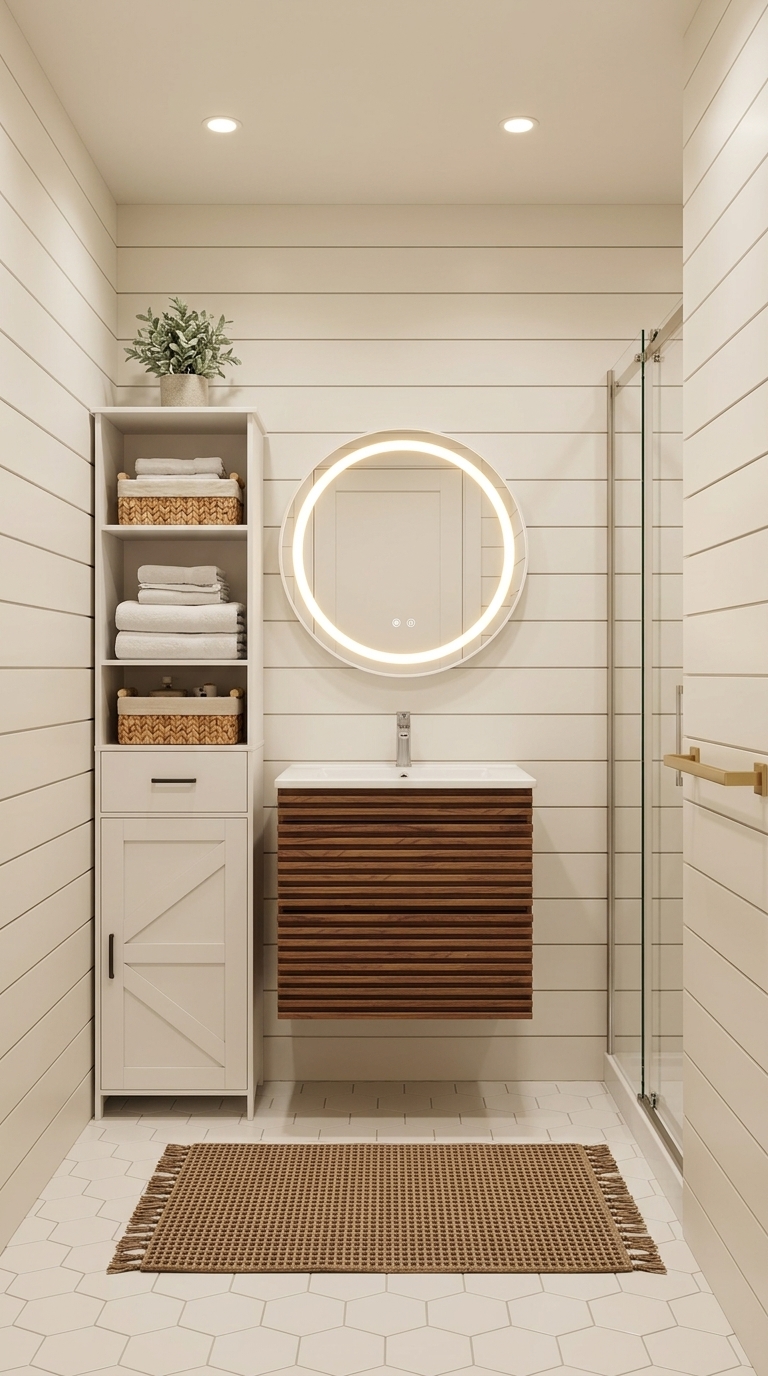
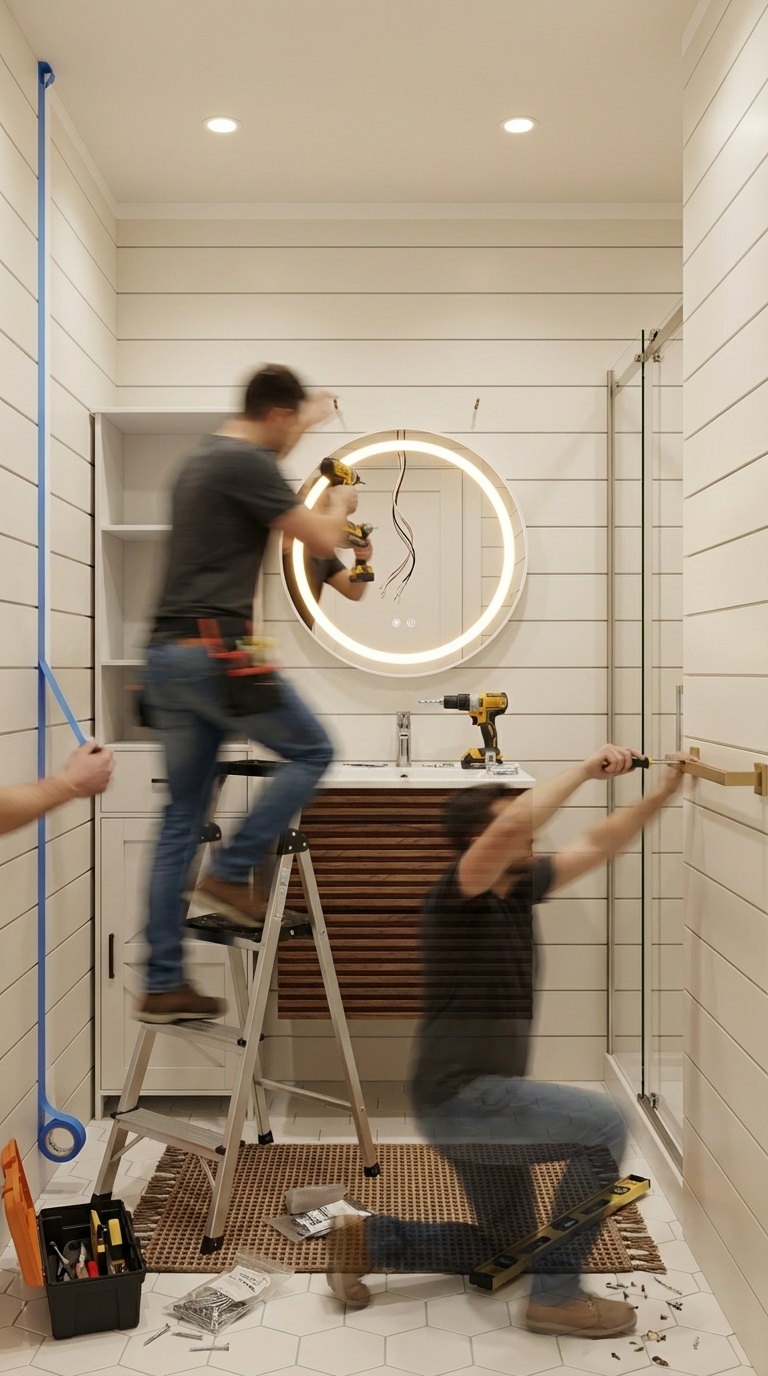
Stage 7 — Fixtures, Storage & Hardware Installation
The final and most rewarding stage. The tall floor-standing storage cabinet was positioned in the left corner, its barn doors swinging open to reveal neatly organized shelves. The floating walnut vanity was wall-mounted and leveled. The LED round medicine cabinet was centered above the sink and wired in — its warm halo glow filling the space with soft, flattering light. The brushed gold towel bar set was drilled in beside the vanity. Wicker baskets were slid into the cabinet shelves. One by one, every storage piece clicked into place.
5 Smart Storage Tips for Small Bathrooms
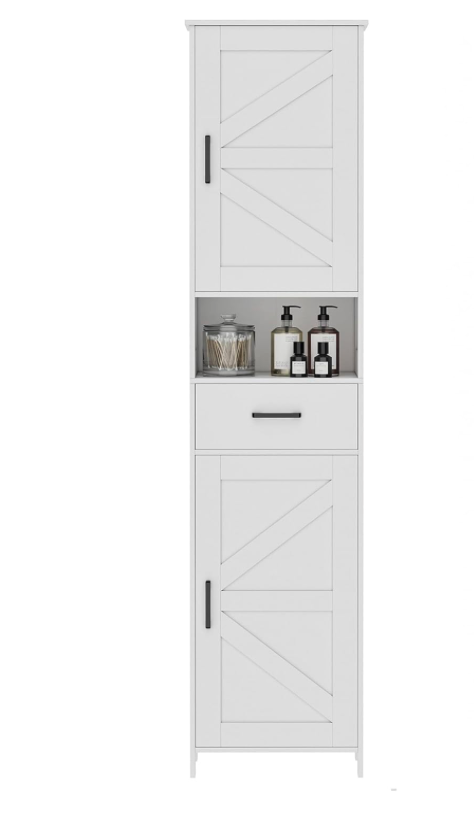
1. Go Tall, Not Wide
In a small bathroom, floor space is premium real estate. The single most effective storage upgrade available is swapping a low, wide cabinet for a tall, narrow floor-standing unit. A 67-inch tall cabinet with the same footprint as a side table gives five times the storage capacity. Placed in a corner, it disappears into the room architecture while holding towels, toiletries, medications, and cleaning supplies — everything out of sight and off the counter.
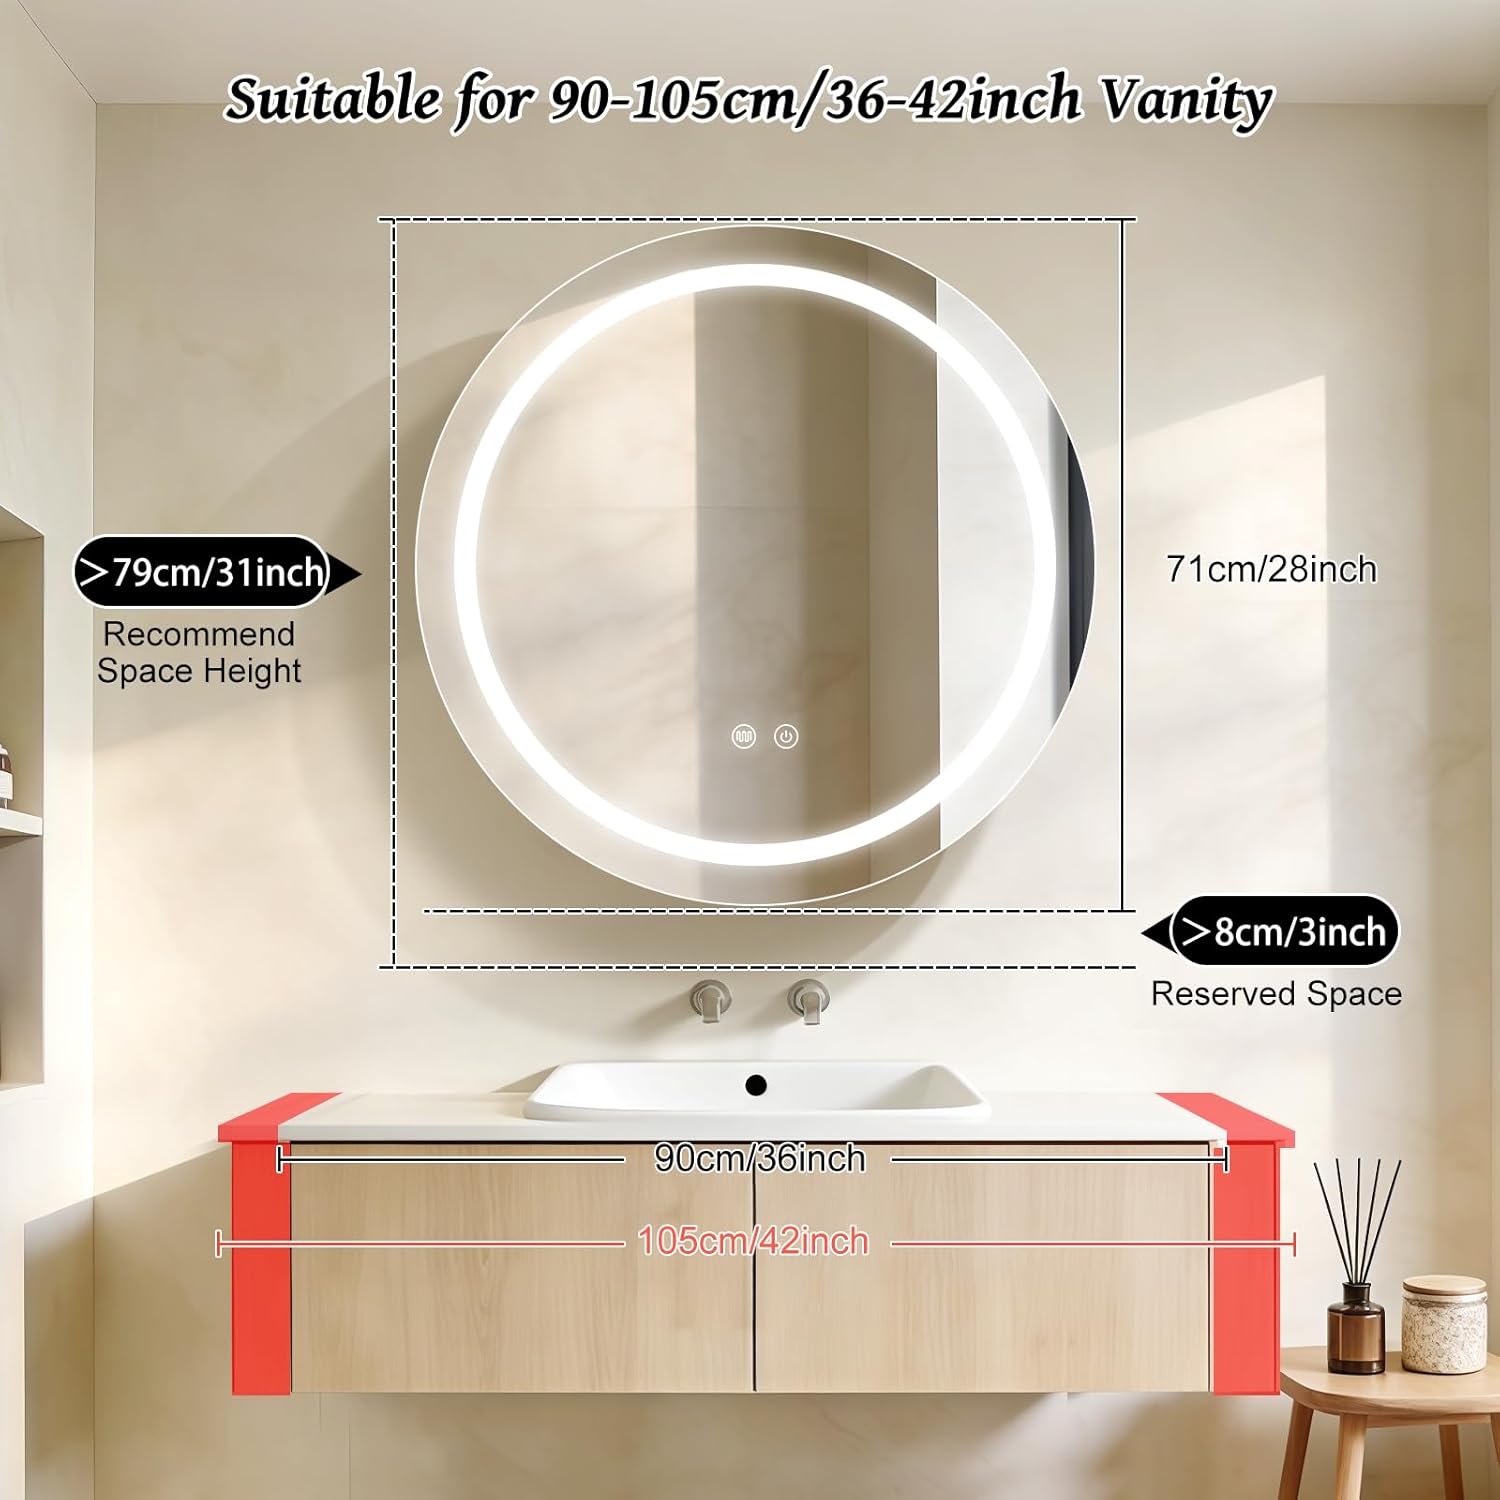
2. Replace Your Mirror with a Medicine Cabinet
If a standard flat mirror is installed above the vanity, one of the best storage opportunities in the room is being wasted. A surface-mounted LED medicine cabinet takes the same wall space as a mirror but adds 4-6 inches of depth and multiple shelves behind the door. The LED lighting is a bonus — it provides flattering, even illumination for grooming that a recessed ceiling light can never replicate.
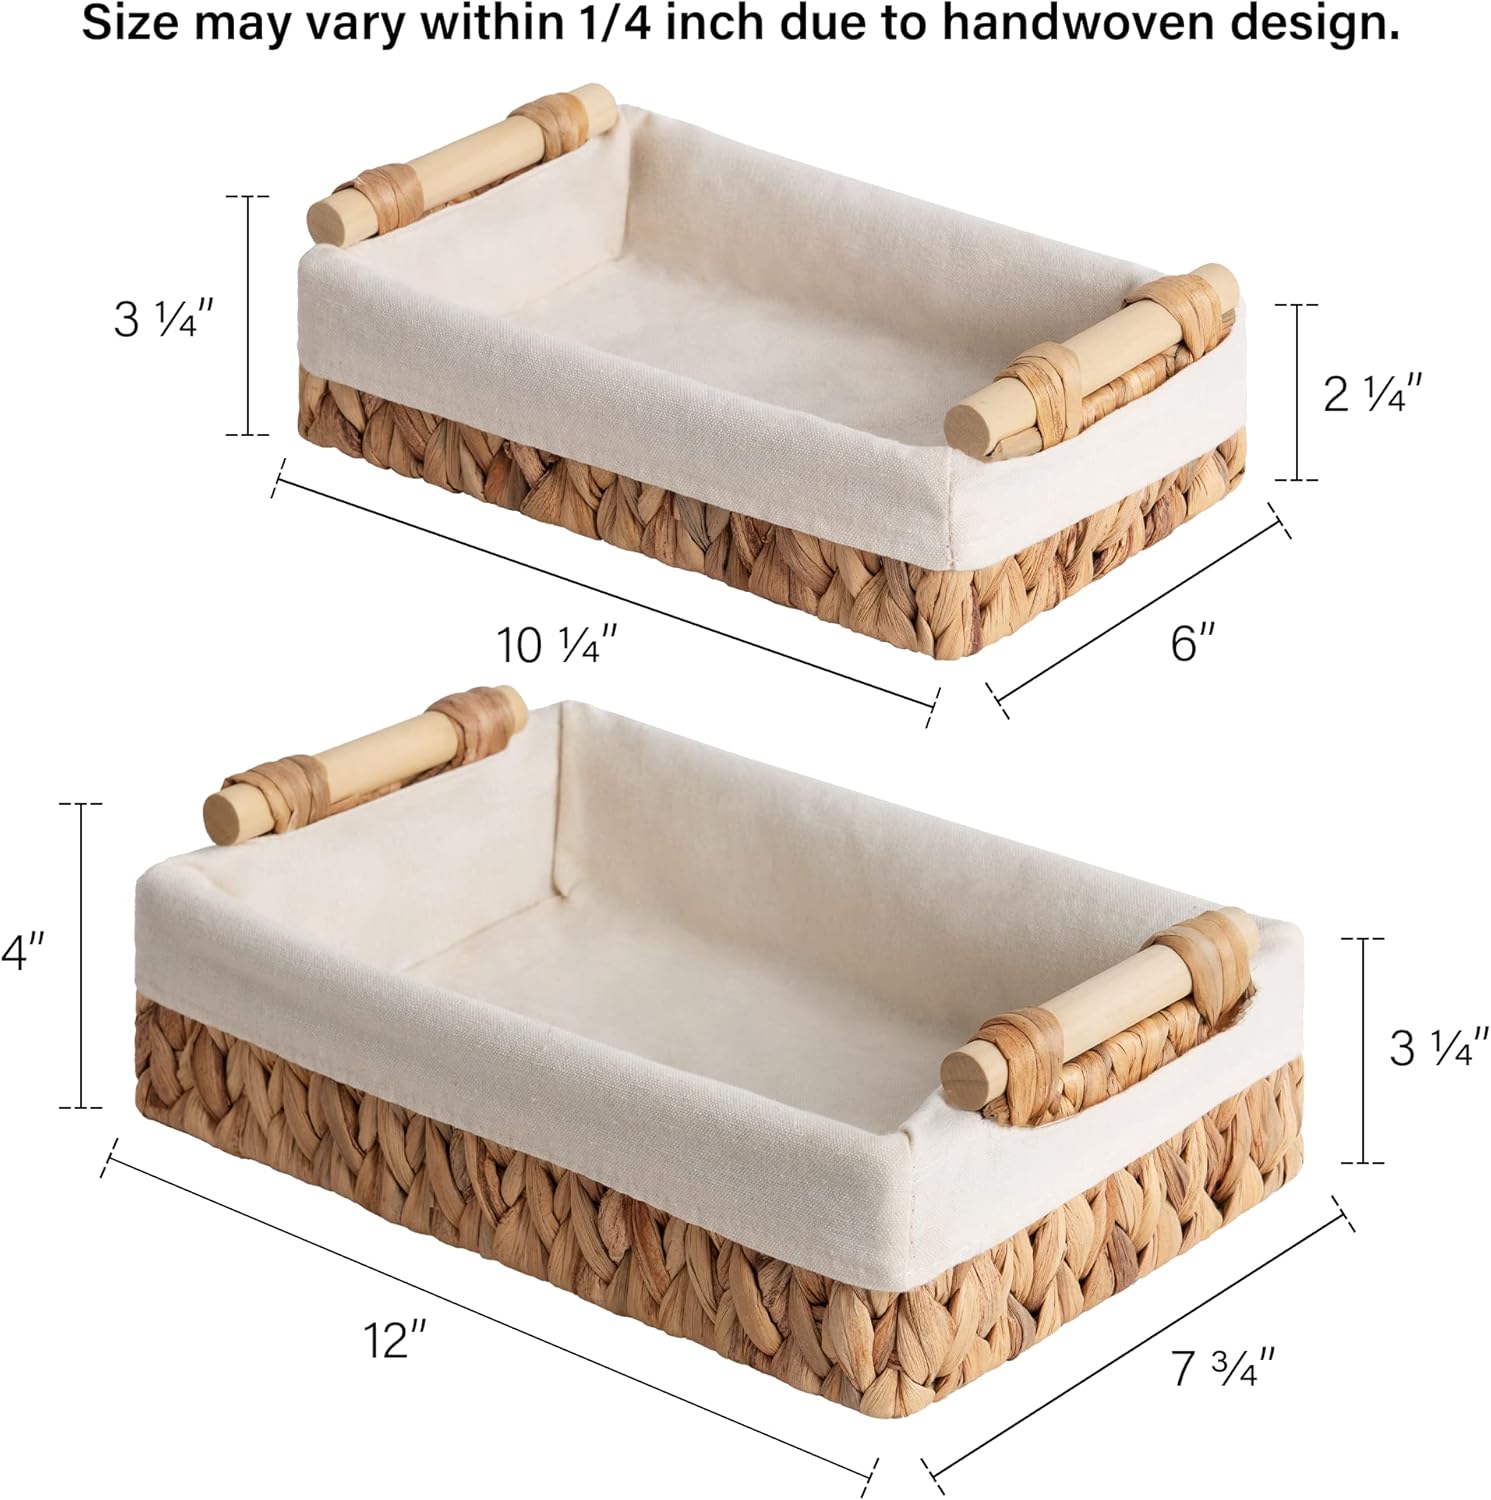
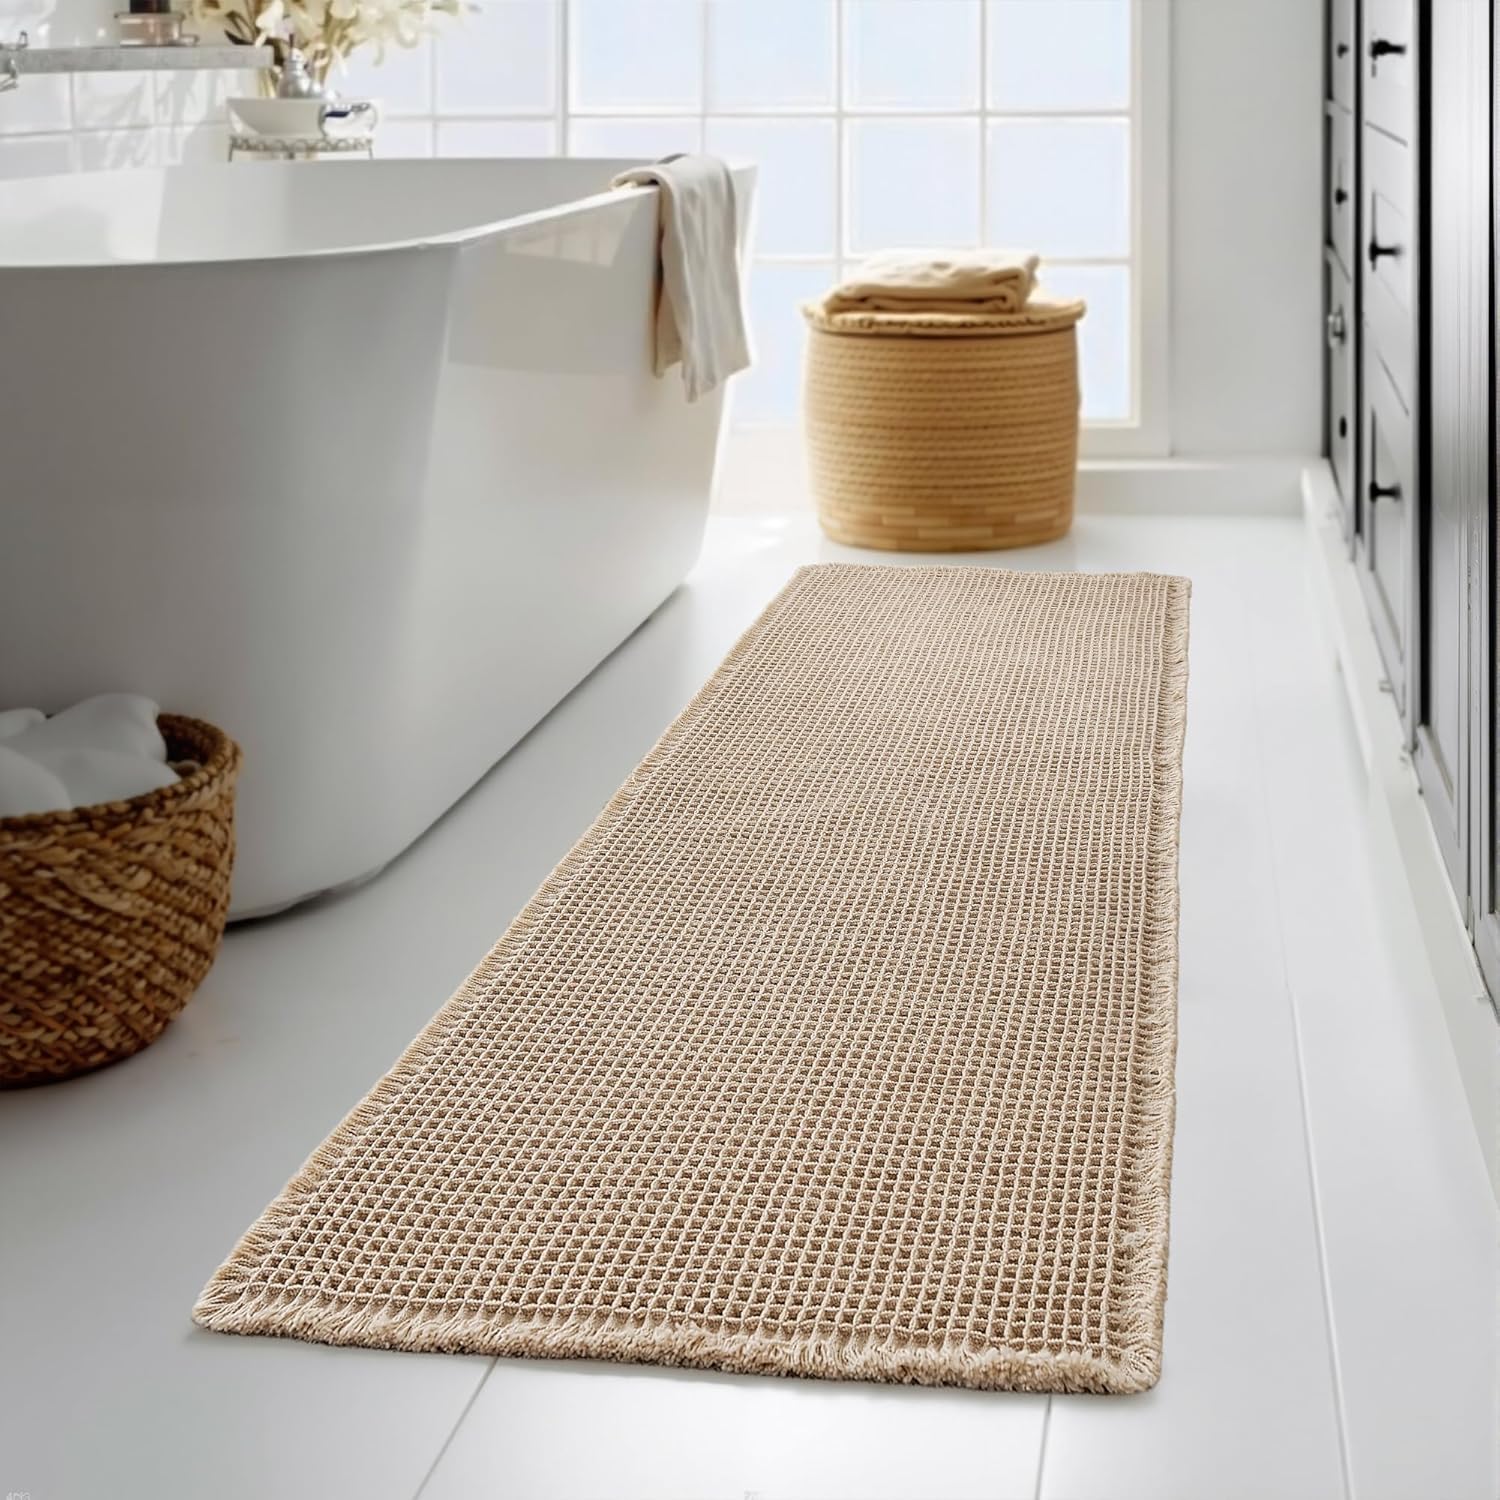
3. Use Wicker Baskets as Open Shelf Organizers
Open shelves look beautiful in design photos but turn chaotic in real life — unless baskets are used. Natural wicker baskets act as soft containers that corral loose items while adding organic texture to the room. Placed on the open shelves of a tall cabinet or on floating wall shelves, they create an organized look that still feels relaxed and lived-in.
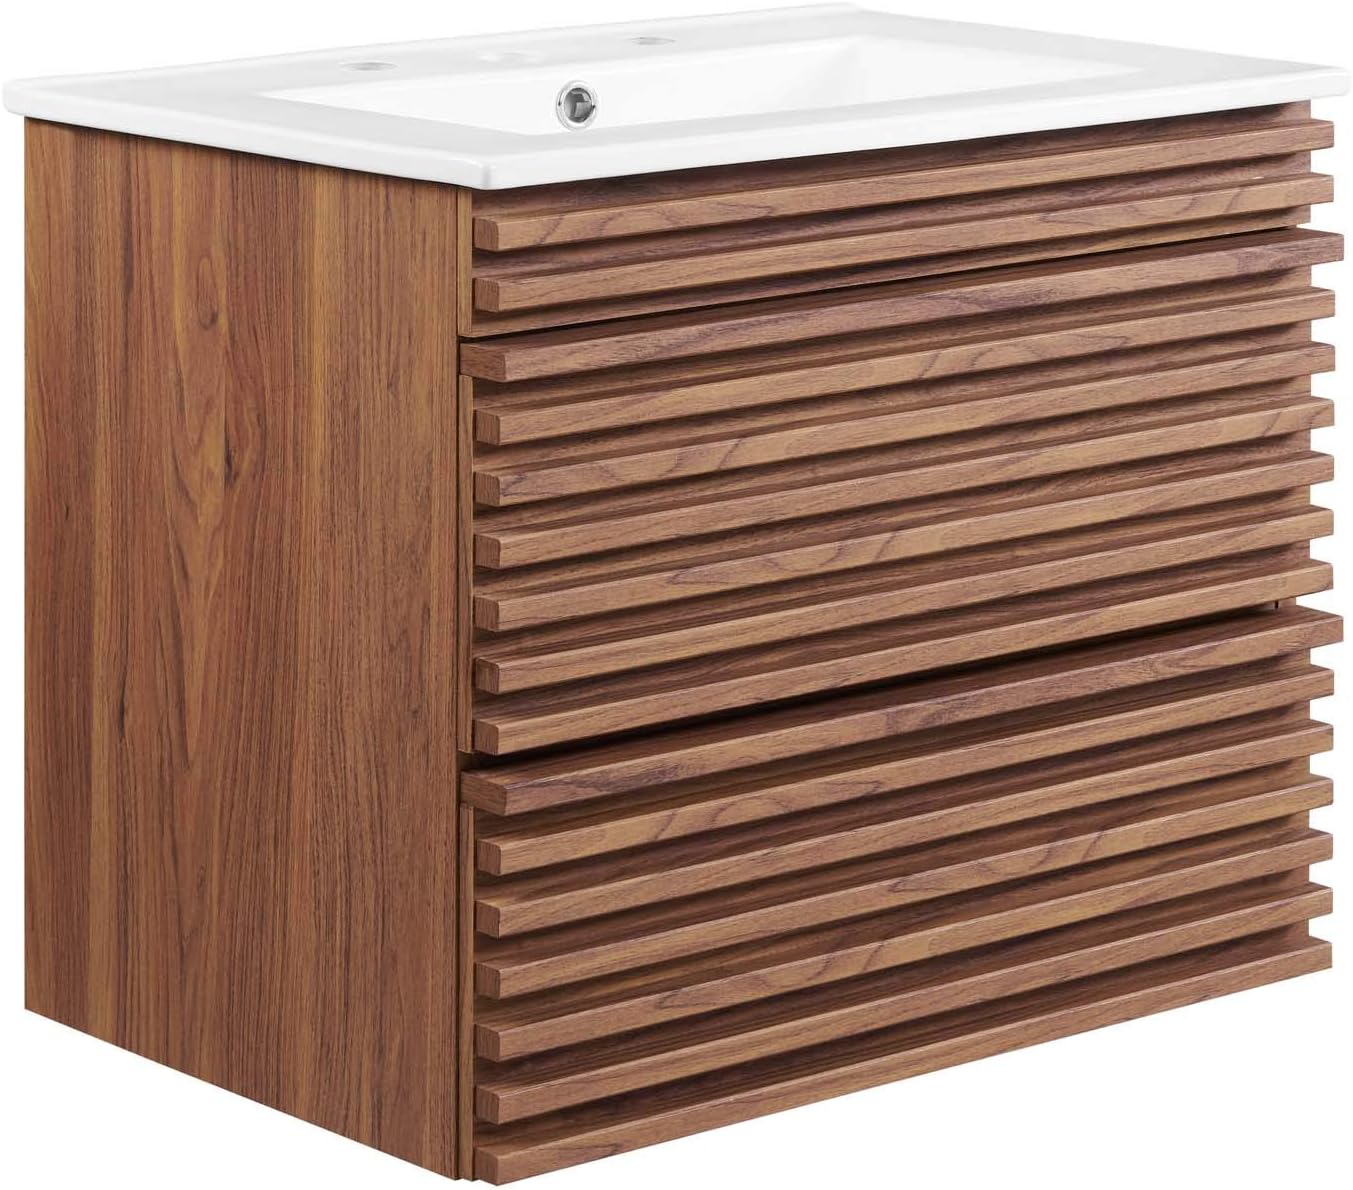
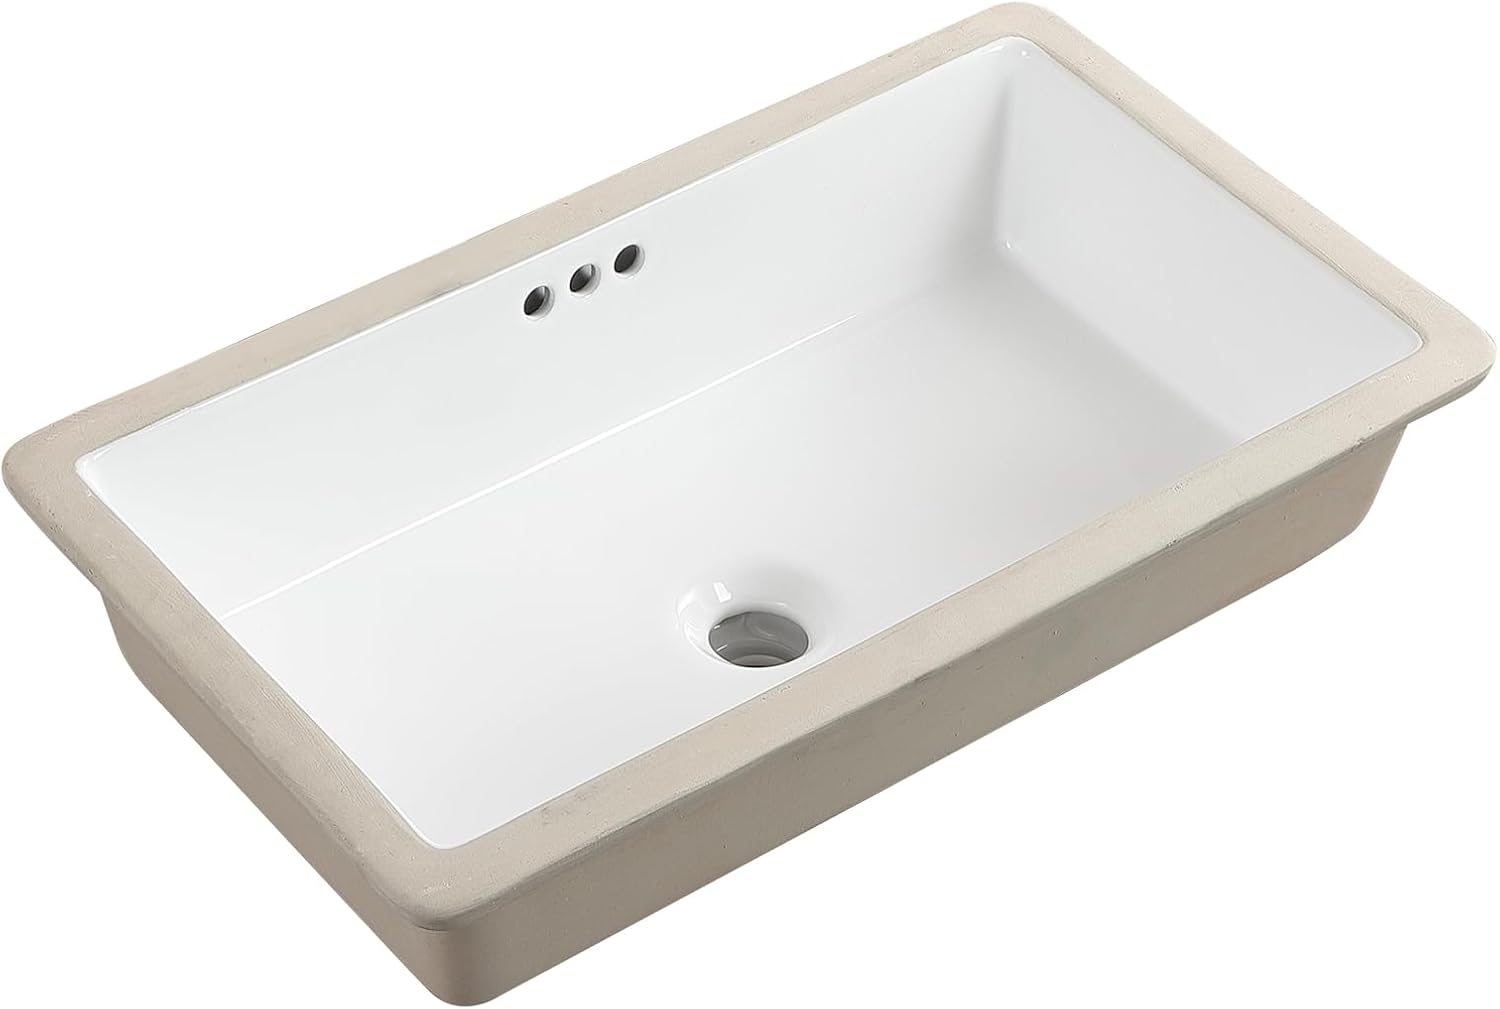
4. Float Your Vanity to Open the Floor
A wall-mounted floating vanity creates the visual illusion of more floor space by exposing the floor beneath it. In a small bathroom, this single design choice can make the room feel 20-30% larger than it actually is. Paired with a compact single-sink model, full drawer storage is achieved below while keeping the footprint minimal.
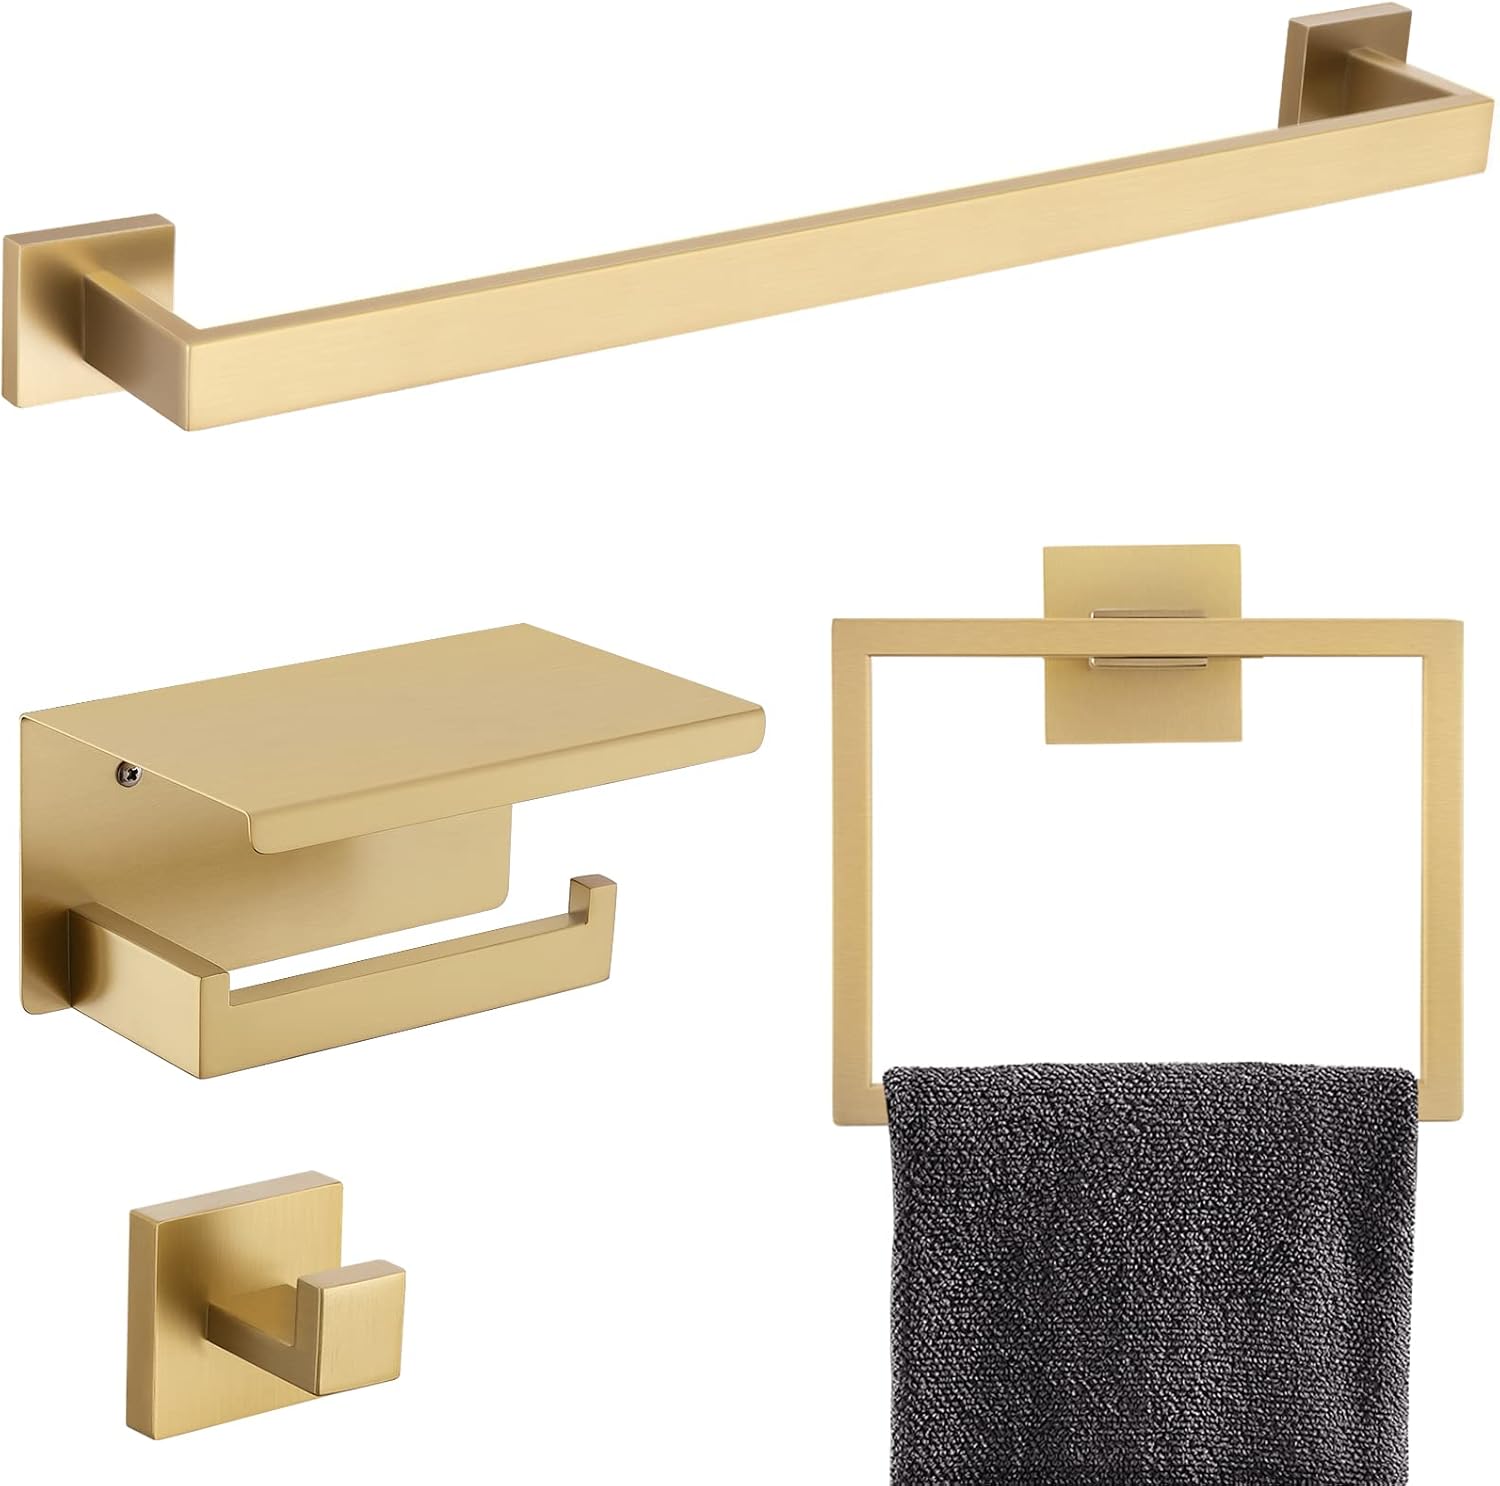
5. Match Your Hardware Finish Throughout
In a small bathroom, the eye travels the entire room in seconds. Inconsistent hardware finishes create visual noise that makes a small space feel even more cluttered. Committing to one finish throughout (brushed gold in this design) creates visual calm and makes the room feel intentionally designed rather than assembled over time.
Frequently Asked Questions
What is the best floor-standing storage cabinet for a small bathroom?
The best floor-standing bathroom storage cabinet for a small space is tall and narrow — ideally under 16 inches wide and at least 60 inches tall. Look for adjustable shelves, at least one closed storage section with doors to hide clutter, and a finish that matches existing bathroom aesthetics. White wood or engineered wood cabinets are the most versatile since they brighten small spaces and pair with virtually any hardware finish.
How do I maximize storage in a very small bathroom?
The most effective strategies for maximizing storage in a very small bathroom are: use vertical space with a tall floor-standing cabinet, replace a flat mirror with a medicine cabinet, add floating wall shelves above the toilet, use wicker baskets to organize open shelves, and choose a wall-mounted floating vanity to free up floor space. Together these five changes can dramatically increase usable storage without touching the floor plan.
Are floor-standing bathroom cabinets freestanding or do they need to be anchored?
Most floor-standing bathroom storage cabinets are freestanding and don’t require wall anchoring for everyday use. However, if young children are present or the cabinet is particularly tall (over 60 inches), it’s always a good idea to secure it to a wall stud with an anti-tip strap. This is a simple safety measure that takes five minutes and provides significant peace of mind.
What size medicine cabinet do I need for my bathroom vanity?
As a general rule, a medicine cabinet should be no wider than the vanity — ideally the same width or slightly narrower. For a 24-inch single vanity, a 24-28 inch medicine cabinet is ideal. Surface-mount cabinets (which attach directly to the wall) are easier to install than recessed models and work in any bathroom regardless of wall construction.
Can I use wicker baskets in a humid bathroom environment?
Yes, with some care. Natural wicker and water hyacinth baskets hold up well in bathrooms when they’re not in direct contact with water and have adequate ventilation. Avoid placing them in the shower or directly beside a sink where they’ll get splashed regularly. For floor-standing cabinet shelves and wall shelves away from water sources, natural wicker baskets are a perfectly durable and beautiful choice.
Ready to Organize a Small Bathroom?
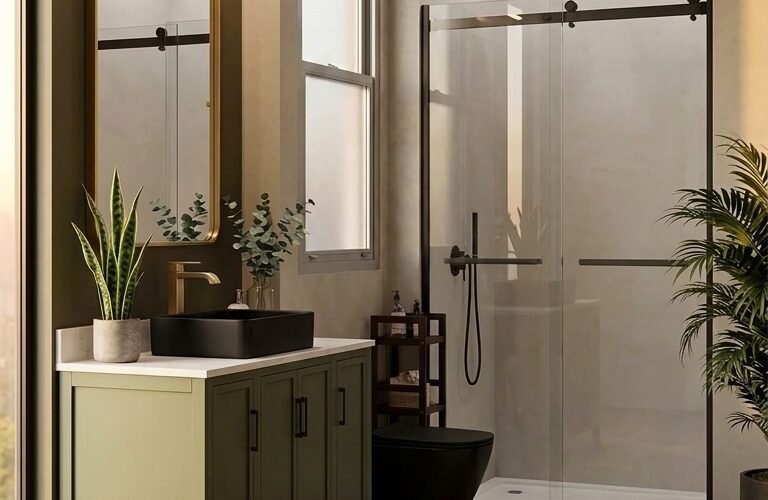
A small bathroom doesn’t have to feel small. With the right storage cabinet, a medicine cabinet that doubles as a mirror, wicker baskets that keep shelves organized, and hardware that ties the whole look together, even the most compact bathroom can feel intentional, calm, and luxurious.
Every product featured in this guide is available on Amazon — click any item in the Shop the Look section above to find it. The entire product selection in this bathroom totals under $1,050, making this one of the most cost-effective bathroom transformations available.
Save this post, pin it for the next renovation, and tag the site when a small bathroom transformation is complete. The team would love to see it. 🛁

Leave a Reply